 |
 |
 18-03-12, 10:32 PM
|
#1 |
|
Member

Join Date: May 2011
Location: Manchester
Posts: 396
|
Having fractured my wrists in the past and getting wrist pain after an hour's riding, decided i needed to try something to reduce weight i'm putting on them.
Accossato 4cm raised clip-ons. http://www.bikersdiscountstore.co.uk...ons-pd-129.php or http://www.intobikes.co.uk/products/...-Rise-Clip-Ons Significantly cheaper than Helibars but not as drastic as a full 'Comfort Kit'.   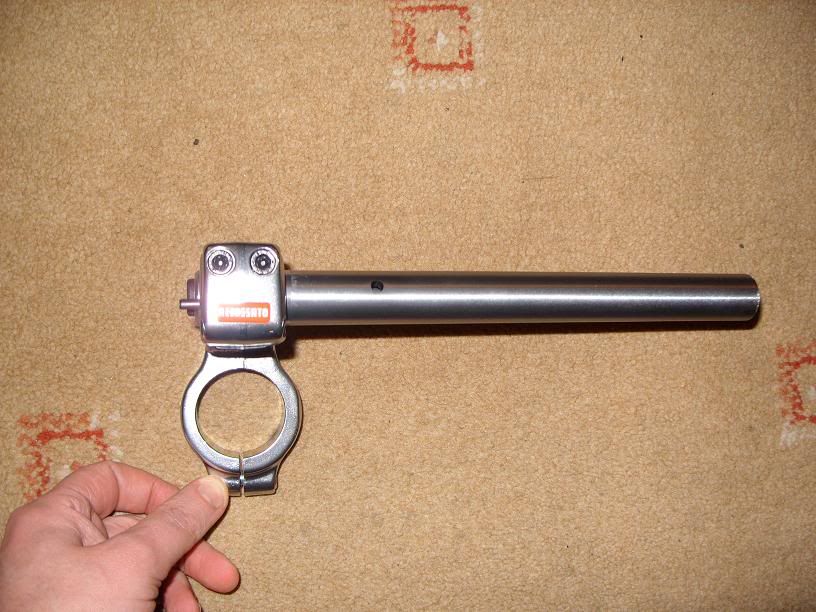 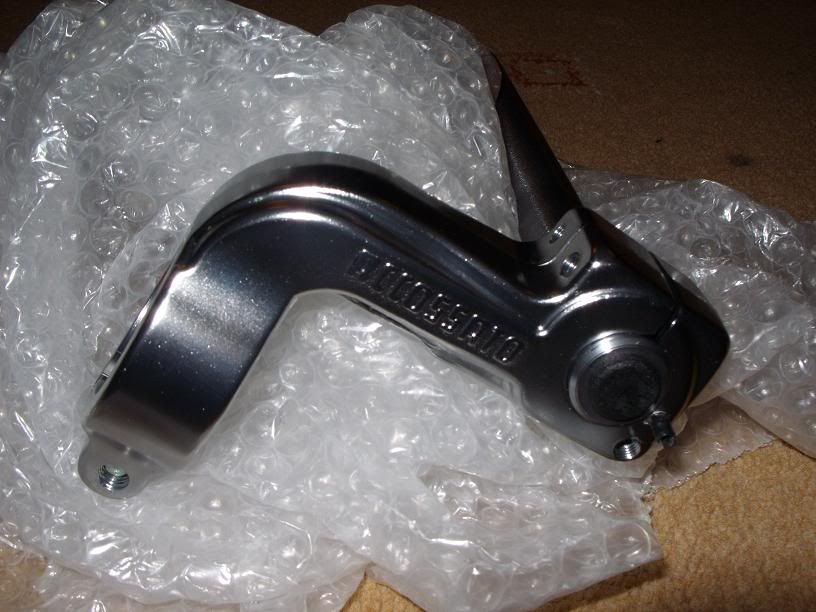 Instructions are in Italian only! 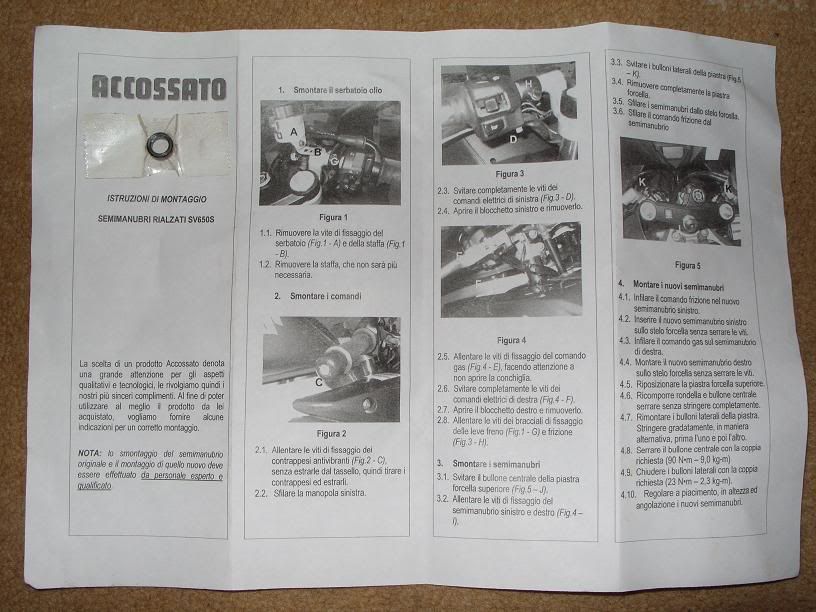 So to fitting Requires:- Stubby Phillips Screwdriver. Long Phillips screwdriver. 8mm, 10mm, 12mm and 32mm sockets. 6mm Allen driver socket. Torque wrench. 8mm ring spanner. 4mm drill bit and drill. May need: Paddock stand. Car jack. Dissassembly first shows up that the Bar End Weights in the OEM Clip-ons do not directly fit the Accossato bars so replacement Bar end weights to fit 17-18mm I.D. bar end will need to be bought, or removing internal spacer tubes and adding washers you can eventually get the left side to fit. Everything comes apart pretty cleanly. 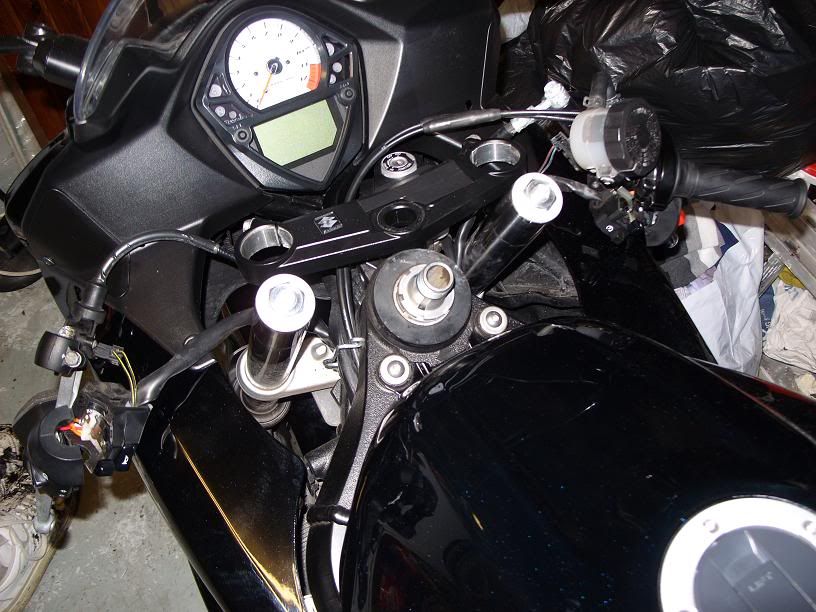 Comparing OEM to Accossato Clip-ons: 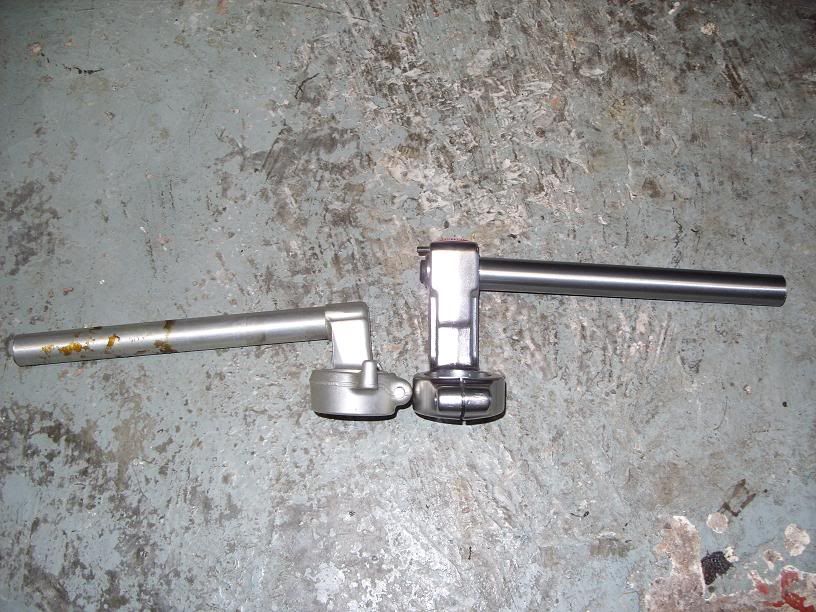   Reassembly with the new clip-ons. Top Tip. If having trouble refitting the upper yoke, then jack the bike up under the engine (just behind the oil filter) to take the weight off the front forks. (this took me a long tiime to work out and do). You will then find that as the dowel pin and screw hole for mounting the brake reservoir are not horizontal 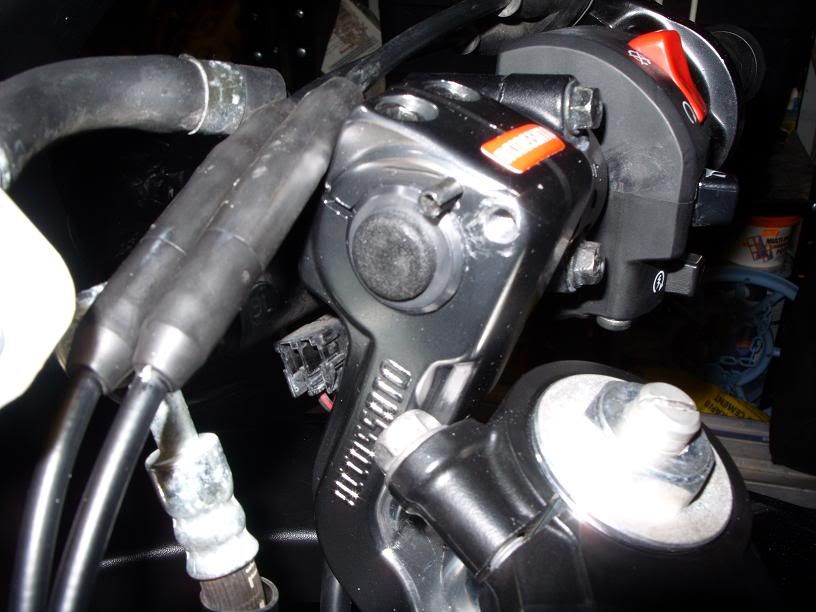 you will need to drill an additional hole in the reservoir plastic so that the reservoir sits as horizontal as possible. 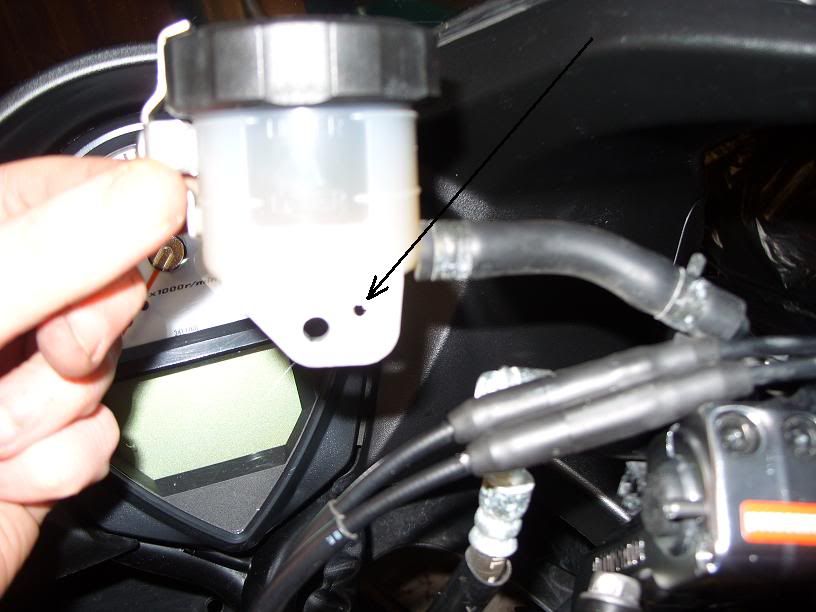 Then it all bolts back together. You may need to adjust front brake line if you are having the clipons in a high position, but will probably need longer brake lines to put them to the top ( i.e. get most benefit from fitting these bars)( see later post in this thread). Some Before and after Pics:- Before 1 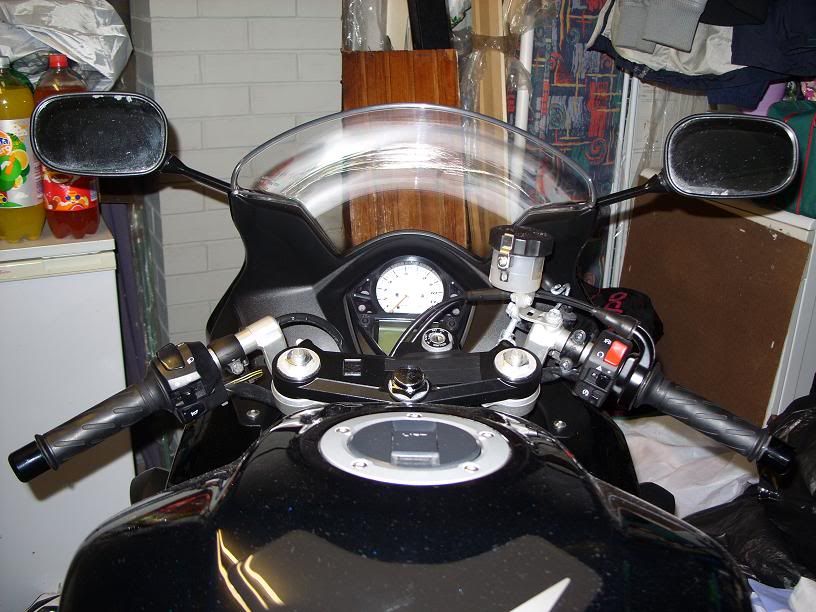 After 1 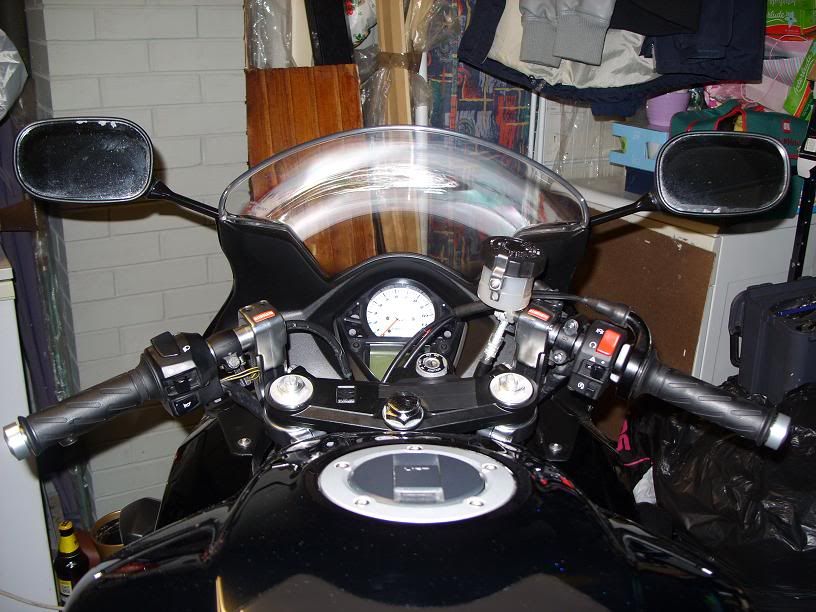 Before 2 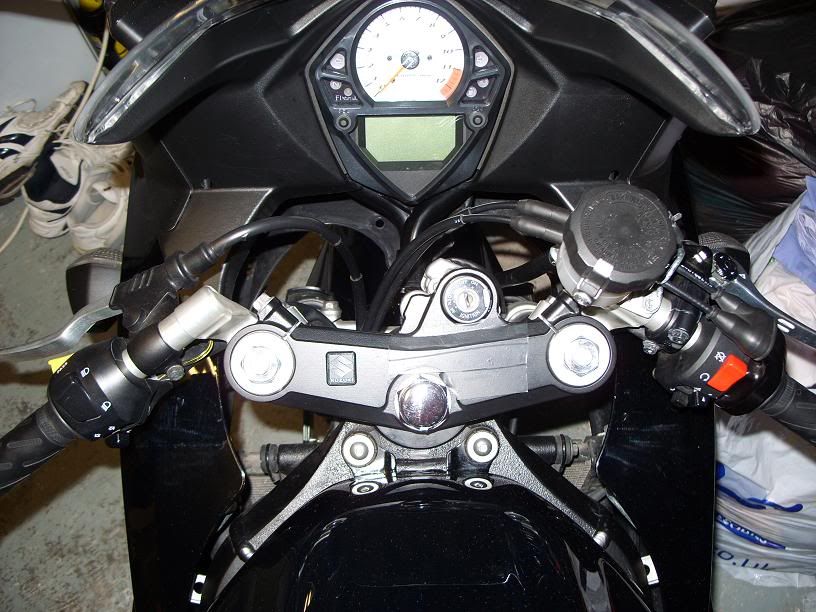 After 2  Before 3 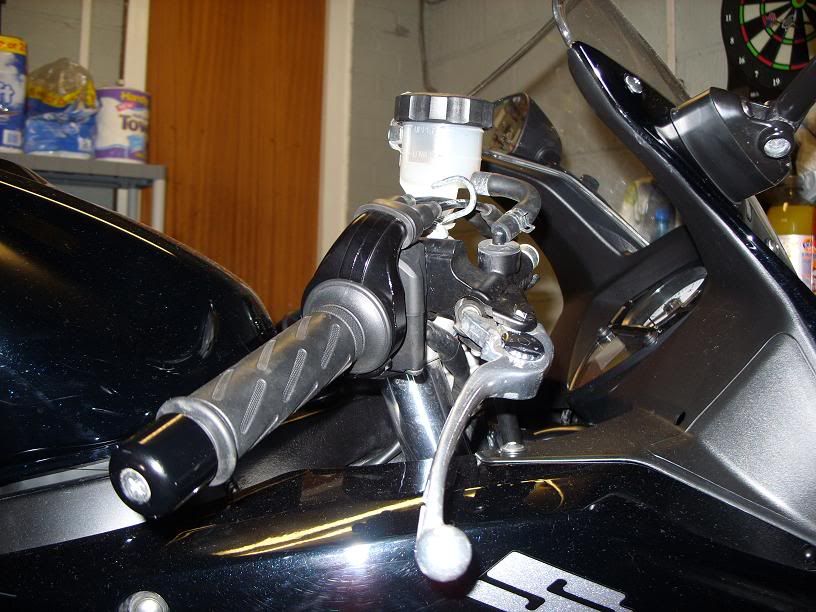 After 3 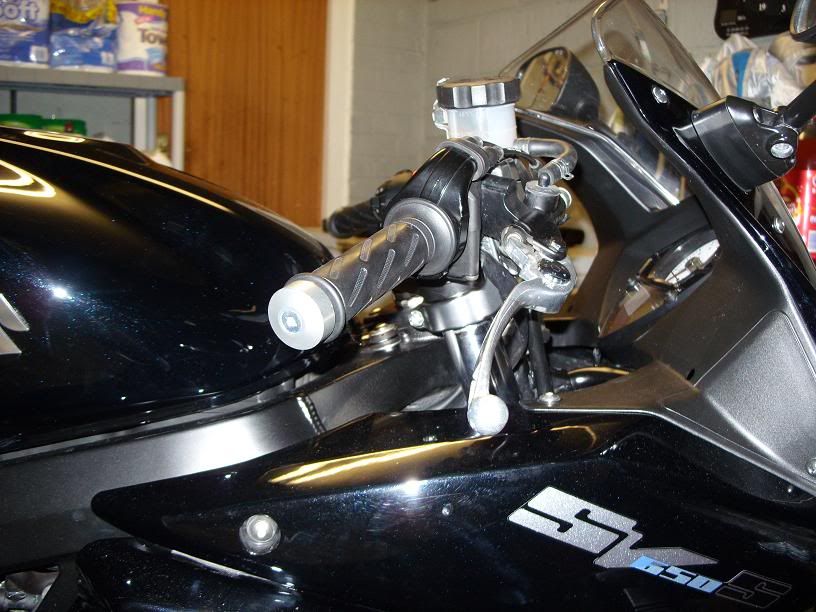 Before 4 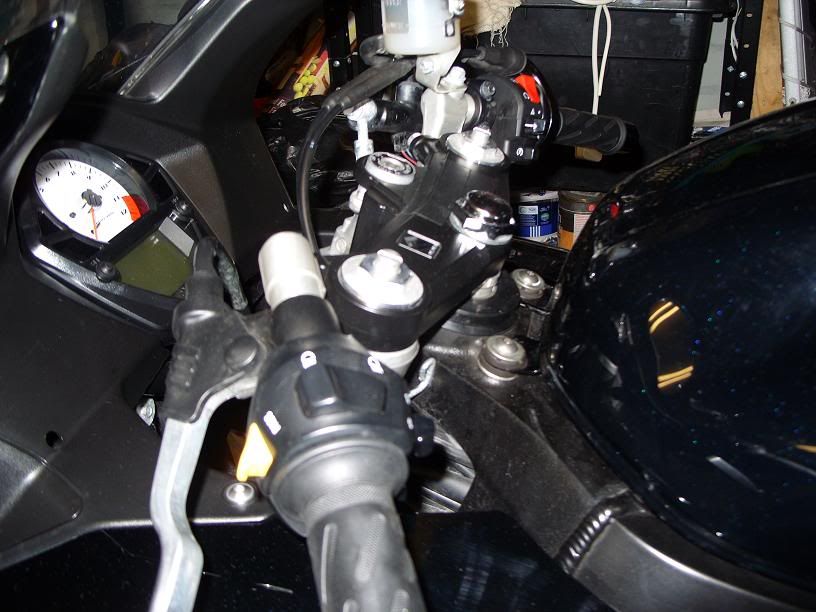 After 4 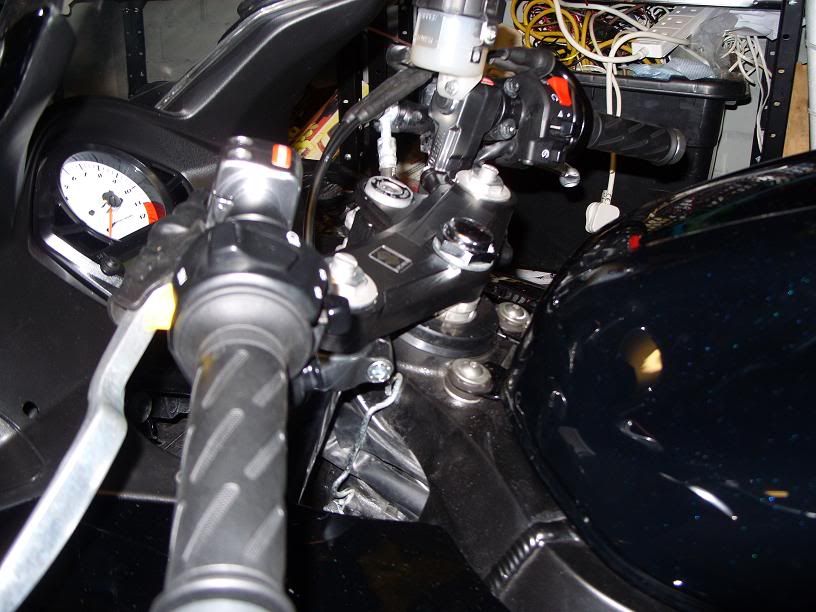
__________________
SK9 Sport Black Delkevic can. Non arbores caesa suum mittere nuntius, sed magnum numerum electrons uehementissime incommo. Last edited by Shawthing; 17-09-12 at 08:24 PM. |

|

|
|
18-03-12, 11:29 PM
|
#2 |
|
Member
Join Date: May 2011
Location: Manchester
Posts: 396
|
Oh and English (Google) translation of the Italian Instructions:-
Assembly Instructions Handlebars raised SV650S The choice of a product Accossato shows great attention to quality and technological aspects, so I turn to our most sincere congratulations. In order to best use the product you purchased, we provide some guidelines for proper installation. Note: the dismantling of the original handlebar and the mounting of the new one will be undertaken by qualified and experienced personnel. 1. Remove the oil tank 1.1 Remove the fixing screw of the tank (Fig. 1-A) and the bracket (Fig. 1-B). 1.2 Remove the bracket, which will no longer necessary. 2. Remove Commands 2.1 Loosen the screws securing the counterweight vibration (Fig. 2-C), without removing from the dowel, and then pull them out of balance. 2.2 Remove the left grip. 2.3 Unscrew the screws of the electrical controls on the left (fig.3.D). 2.4 Opening the block left and remove it. 2.5 Loosen the screws of the throttle (fig4-F), being careful not to open the shell. 2.6 Unscrew the screws of the electrical controls on the right (Figure 4-F). 2.7 Open the right block and remove it. 2.8 Loosen the screws fixing bracelets brake lever (Figure 1-G) and clutch (fig3-H). 3 Remove the handlebars 3.1 Remove the center bolt of the upper triple clamp (Figure 5-J). 3.2 Loosen the screws securing the left and right handlebar (Figure 4-I). 3.3 Unscrew the bolts side of the plate (Figure 5-K) 3.4 Completely remove the triple clamp. 3.5 Remove the handlebars from the fork leg. 3.6 Pull the clutch lever from handlebar. 4 Install the new handlebars 4.1 Push the clutch in the new left handlebar. 4.2 Plug the new front fork on the left handlebar, without tightening the screws. 4.3 Push the throttle on the right handlebar. 4.4 Install new fork leg on the right handlebar, without tightening the screws. 4.5 Replace the top triple clamp. 4.6 Reassemble the washer and tighten center bolt without tightening fully. 4.7 Replace the side plate bolts. Tighten gradually, in an alternative way, first one and then the other. 4.8 Tighten the center bolt with the torque (90 Nm ~ 9.0 kgm) 4.9 Close the side bolts with the torque (23Nm ~ 2.3 kgm). 4.10 Adjust at will, height and angle The new handlebars. 5 Replace Commands 5.1 Aim of the throttle cables upwards. 5.2 Place the master cylinder on the right handlebar. Be careful to refit the armband marked 'UP' upwards. Then tighten the screws (Figure 6-L) lower and upper mounting, alternatively, paying attention to the dividing line of the cuff. Possibly not completely block the brake command to perform an additional adjustment later. 5.3 Mount the oil reservoir on the handlebar, using the new spacer (Figure 6-M), align with the appropriate reference pin (Figure 6-N). 5.4 Mounting the command Right dimmer switch, paying attention to the reference hole. Close the screws (Figure 7-O). 5.5 Assemble the counterweight bringing it into contact with the right handlebar, tighten the screw firmly. 5.6 Bring the throttle against the dimmer switch block and tighten the screws (Figure 7-P). 5.7 Ensure that the throttle is able to rotate smoothly. 5.8 Mount the dimmer control left, paying attention to the reference hole. Close the screws (Figure 8-Q). 5.9 Install the knob on the left handlebar. 5.10 Assemble the counterweight bringing it up against the left handlebar, tighten the screw firmly. 5.11 Sit on the bike and check the correct positioning of the handlebars new clutch and brake controls to suit your needs. Tighten the screws on the handlebars (Figure 9-R) with the required torque (23Nm ~ 2.3 kgm). Note: You should periodically check the tightness of all bolts.
__________________
SK9 Sport Black Delkevic can. Non arbores caesa suum mittere nuntius, sed magnum numerum electrons uehementissime incommo. Last edited by Shawthing; 18-03-12 at 11:31 PM. |
|
|
|
|
19-03-12, 08:35 AM
|
#3 |
|
Member
Mega Poster

Join Date: Mar 2007
Posts: 9,097
|
I had them on my curvy, did improve things over the standard bars
Just check that your brake lines have enough slack, as it'll fail the MOT, but worse they could pop apart at the banjo, if the front over extends, giving instant brake failure I had to change mine, even though I thought there was enough slack. Better safe than sorry
__________________
We're riding out tonight to case the promised land Make everyday count RIP Reeder - Jolly Green Giant and comedy genius Last edited by maviczap; 19-03-12 at 08:38 AM. |
|
|
|
|
30-03-12, 09:40 PM
|
#4 |
|
Member
Join Date: Sep 2004
Posts: 557
|
LSL did a similar set of raised clip ons. I have a set in garage, really good quality.
|
|
|
|
|
28-04-12, 01:15 PM
|
#5 |
|
Member
Join Date: May 2011
Location: Manchester
Posts: 396
|
As maviczap says.
On further inspection and jacking the front of the bike up again, it showed that there is Not enough length in the standard brake lines, even with the lower yoke clamp disconnected to allow the bars to be raised to their highest position (and get the full effect from the raised bars), and at the same time allow full extension of the forks. IMO Replacement longer brake lines are cirtainly required. OEM brake line length (center of banjo to center of banjo) from master cylinder to right brake caliper was measered at 73cm. Luckily HEL lines are made just a bit longer and the two line set (HBK7646) came in at 76.5cm (right) and 79cm (left). Only issue i had with the HEL lines was that the Banjos weren't at 90degrees rotated end to end meaning the lines needed to be spiraled down to the caliper. With the lines fitted, bled and tested, exercising the stearing i found that on full left lock the wiring to the right switch gear was too tight. Not good if you use the ignition stearing lock all the time. Disconnecting the right hand switch gear from the loom and then re-routing the wire bundle infront and above (instead of below and behind) the frame cross member, and reconnecting to the loom gives more than enough free play in the wiring to avoid any possible wire stress and possible wire breakage. This is a review, so the question is 'Was it all worth it?' IMO YES After a good long run the stresses on my arms and wrists are significantly less than i am used to on similar previous runs.
__________________
SK9 Sport Black Delkevic can. Non arbores caesa suum mittere nuntius, sed magnum numerum electrons uehementissime incommo. Last edited by Shawthing; 17-09-12 at 08:26 PM. |
|
|
|
|
01-07-12, 06:25 PM
|
#6 |
|
Guest
Posts: n/a
|
so are these any good?
|
|
|
|
02-07-12, 11:48 AM
|
#7 | ||
|
Guest
Posts: n/a
|
Quote:
Quote:
|
||
|
|
|
02-08-13, 09:35 AM
|
#8 |
|
Guest
Posts: n/a
|
Fantastic write up and review very informative, how much were the brake lines asI think I already have a set of braided lines up the shed waiting to go on bike I will measure them. I been keeping my eye on here in case any one was selling pair but no luck so may have to buy them from the links you supplied mate.
One question from distance does it make the bike look less sporty with raised handlebars, mine is fully faired and didn't want the bike to look odd. if you get what I mean lol |
|
|
|
02-08-13, 11:30 AM
|
#9 |
|
Member
Join Date: May 2011
Location: Manchester
Posts: 396
|
http://www.helperformance.com/motorcycle/suzuki/sv650/
Ignore the satnav: 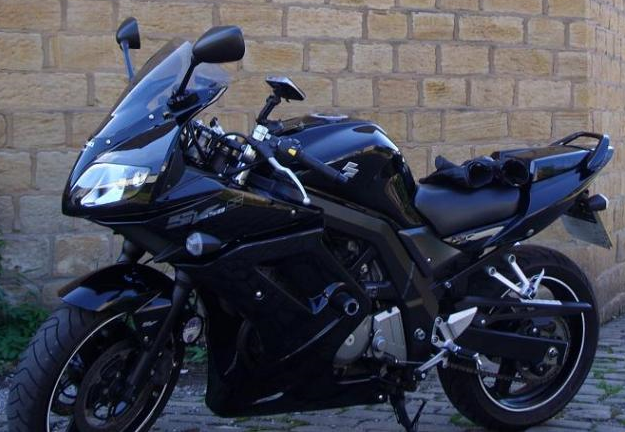 Looks are very subjective. Still one of the best Mods on the bike, alowing me to do a 120miler last weekend. Realy did make a significant difference to me. Only thing is, if you are going to do trackdays/racing i wouldn't advise fitting as the bars feel a little too close to you when you are crouched down behind the screen.
__________________
SK9 Sport Black Delkevic can. Non arbores caesa suum mittere nuntius, sed magnum numerum electrons uehementissime incommo. Last edited by Shawthing; 02-08-13 at 11:36 AM. |
|
|
|
|
02-08-13, 12:13 PM
|
#10 |
|
Member

Join Date: May 2012
Location: Wickford, Essex
Posts: 259
|
Very nice report, thanks mate
__________________
"If more of us valued food and cheer and song above hoarded gold, it would be a merrier world." -Thorin Oakenshield, The Hobbit |
|
|
|
 |
|
|
 Similar Threads
|
||||
| Thread | Thread Starter | Forum | Replies | Last Post |
| Pointy, raised clip ons fitted. | kerby | SV Talk, Tuning & Tweaking | 12 | 05-11-10 12:21 PM |
| my new baby *image heavy* | Amplimator | Photos | 17 | 11-05-09 10:19 PM |
| Been out for my best ride yet (image heavy) | Magnum | Photos | 26 | 11-04-09 12:08 PM |
| WTB: raised clip-ons for curvy | mnrsmith | Stuff Wanted | 0 | 30-03-09 08:35 PM |
| 70s bike day at the Ace (Image heavy) | empty | Photos | 6 | 23-07-07 03:33 PM |

