 |
 |
| SV Talk, Tuning & Tweaking Discussion and chat on all topics and technical stuff related to the SV650 and SV1000 Need Help: Try Searching before posting |
 |
|
|
Thread Tools |
|
|
#1 |
|
Guest
Posts: n/a
|
Well, here it is - the long awaited pictorial of the Throttle Position Sensor (TPS) Adjustment .
Q: What does it do?? A: Basically, Fuel injected Suzukis have a sensor that senses what revs the engine is at and then tells the fuel injection and engine management systems to alter (basically to start squirting more fuel into the cylinders). MOST bikes are set wrongly and this causes the bike to be jerky at slow speeds (due to the fact that there's not enough fuel getting into the engine & then all of a sudden the fuel starts pumping in faster but by then it's a bit late!! This adjustment rectifies the problem! |

|
|
|
#2 |
|
Guest
Posts: n/a
|
Throttle Position Sensor (TPS) Adjustment
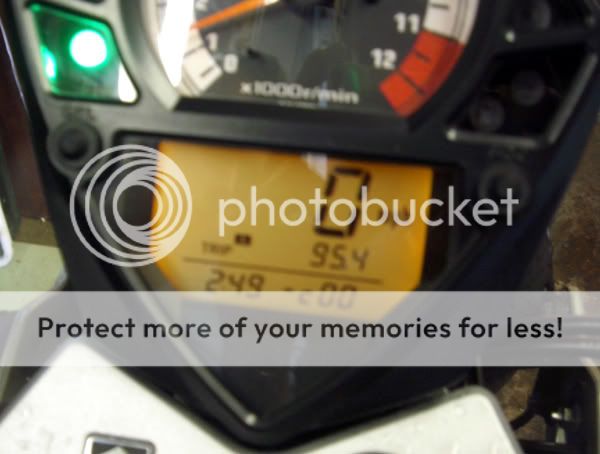
Step-By–Step Guide **Before undertaking this modification, I strongly recommend that you read the instructions through from start to finish & have them to hand during the process** You will need: A length of fairly thin wire (multi-core like the stuff you get on the end of cheap jap speakers is what I found worked best) A Size 25 Security Torx bit (available here, product number 285-9488) 1: You will need to make your ‘dealer mode tool’… Simply take a piece of wire about 3 inches long and strip back about 8mm of the insulating sheath (twist the cores together on multi-core cable). Snip off the last 2-3mm with a pair of scissors or a wire cutter to leave a clean end.  2: Undo the side panels under the saddle…  And remove the saddle…  3: Undo the tank retaining bolts…  Lift the tank & prop up with the tank prop (surprisingly!!)  4: Run the engine until at it’s normal operating temperature (most are around 85-90 degrees – I plump for 86!!) 5: Check & adjust your idle speed… It should be about 1200rpm.  6: If (as above) the idle is too low, locate the idle adjust screw – on the left hand side of the bike in one of the triangle shapes in the chassis and adjust. Turn clockwise to raise the idle speed and anti-clockwise to lower it… Go in small movements and ‘blip’ the throttle after each adjustment and allow it to settle before trusting what the rev counter says!  7: Undo & remove the pillion seat. 8: Locate the Dealer Mode Activation Connector If you look into the tail unit from behind, on the left hand side you should see a bunch of a few wires & connectors behind a bit of plastic protruding from the undertray. Follow this bit of plastic down towards the rider’s saddle and you should find another connector. It’s rectangular, white plastic with 6 holes for connectors in and only 4 of them used. It also has a black rubberised cover on it.    9: Turn off your ignition and put your ‘dealer mode tool’ in the two terminals that are next to each other. **WARNING** Do NOT short out the wire onto the chassis or any other part of the bike. Do NOT connect either of the other two terminals to anything.  10: With the ‘tool’ still in the connector turn on your ignition. The temperature display should have disappeared and now you will see a little line (like a minus sign), the letter c followed by two zeros. If you have any other numbers shown in this display, see here to diagnose your bike’s fault (it’s the dealer diagnostic display!)  11: SLOWLY turn your throttle while looking at the little line on the dash… It [I]should[I] move from the middle of the zeros to the top at about 1450rpm. I will bet money on the fact that it won’t!! It will probably move at about 3000rpm. This is where the fuel injection starts injecting more fuel into the engine so when it’s set too high the bike will be jerky at low speeds! (The line takes a second or two to move, hence turning the throttle slowly!)  12: Turn off the engine and locate the Throttle Position Sensor… It’s under the tank on the left hand side of the bike, just behind the air box.   13: Using your size 25 Security Torx bit…  CAREFULLY undo the two torx bolts on the sensor (the ones at the top & bottom, not either side!).  **WARNING** The bolts are very hard to get to (especially the lower one) and are made of a very fine, soft French cheese!!!! I found it easiest to adjust if you don’t undo the top bolt very much as this way you can pivot it a bit better! 14: Start the engine and turn the sensor anti-clockwise (I think) to decrease the sensor’s activation point. You will need to make very tiny movements of the sensor! You may find that the engine cuts out (or nearly cuts out). If it does stop, try moving the sensor back in the opposite direction & thumbing the starter button again. If this doesn’t help, try increasing your idle speed a little at a time until the engine starts & runs properly again! 15: Keep making small adjustments, turning the throttle slowly while looking at the display to see when the line moves to the top of the display. It should stay in the middle of the display whilst idle and move to the top at around 1450rpm. Keep fiddling – it does happen although it can be bloody fiddly & infuriating! 16: Once you’ve got the line to move at about 1450rpm, very slowly tighten up the bolts on the sensor again – it’s easiest to do the top one first. It’s not a bad idea to hold the sensor steady as you tighten it, as if it moves, the sensor will activate at a different rpm! Check that the line moves at the same revs after you tighten each bolt. 17: Remove the ‘tool’ from the connector, replace the rubber cover, tuck back where you got it from and check that the temperature display returns on the dash!! 18: Put the tank back down, replace your saddle, side panels and pillion seat and go and test!!! _____ I accept no responsibility for this modification or any unexpected effects you may encounter. _____ |

|
|
|
#3 |
|
Guest
Posts: n/a
|
WELL DONE
Excellent and clear proceedure  I can vouch for the french cheese bolts and before anyone says it, I had good quality tools i just was ever so slightly at an angle to the head of the screw and instant cheese Take care and take your time.It is fixable if you cheese it, but its awkward to cut the slots in. Took me 4 times longer to do the slots than it took to do the job. |

|
|
|
#4 |
|
Guest
Posts: n/a
|
Oops - I forgot to mention that if you have a second pair of hands available- USE THEM!
Get them to push against the throttle bodies (on the opposite side of where the TPS sensor is) while you undo and re-do up the bolts... That way you can push in a lot harder and are far less likely to balls up the bolts! (I only did this on the last 2 of the 4 bike's I've done this mod to and it makes it sooooo much easier!) The second bike I did, the bottom bolt head just fell apart and we haven't got round to sorting it yet - no doubt we will do when we repair it (it was BillyC's now somewhat second hand looking bike!!). Also the bottom bolt has some pipes in the way, running along the frsame. You can quite happily move them out of the way. You have about an inch and a half give on them!! |

|
|
|
#5 |
|
Guest
Posts: n/a
|
nice one that chap
no use to us migt we seem to be the poor middle country and only afford k2`s max but no doubt it will get used one day by us |

|
|
|
#6 |
|
Guest
Posts: n/a
|
 |

|
|
|
#7 |
|
Guest
Posts: n/a
|
[quote="Cloggsy
No - it'd been raining pretty hard when we started to do his - our progress then got halted by cheese-bolts! |

|
|
|
#8 |
|
Member
Join Date: Mar 2004
Location: LEEDS
Posts: 189
|
Excellent
How To mate. Thank you very much 30 mins and no cheese This is the 1st mod that has made a big difference. Very smooth in 1st gear. Did I mention I Love you 
__________________
|
|
|

|
|
|
#9 | |
|
Guest
Posts: n/a
|
Quote:
|
|

|
|
|
#10 | |
|
Guest
Posts: n/a
|
Quote:
|
|

|
 |
| Thread Tools | |
|
|
 Similar Threads
|
||||
| Thread | Thread Starter | Forum | Replies | Last Post |
| step bump | hang man | Idle Banter | 3 | 12-10-08 04:53 PM |
| Trying to be green - a step too far | Ed | Idle Banter | 2 | 02-06-08 11:21 PM |
| sv650 to a fz1 is it to big of a step up | jans1971 | Bikes - Talk & Issues | 30 | 28-11-07 02:44 PM |
| Big Brother's next step? | jonboy | Idle Banter | 5 | 20-03-06 03:42 PM |
| What's the next step? | MaxSuzuki | SV Talk, Tuning & Tweaking | 9 | 10-07-03 10:48 AM |