 |
 |
| SV Talk, Tuning & Tweaking Discussion and chat on all topics and technical stuff related to the SV650 and SV1000 Need Help: Try Searching before posting |
 |
|
|
Thread Tools |
 12-11-11, 04:43 PM
|
#191 |
|
Guest
Posts: n/a
|
Met a bloke selling an "03" engine today. No sure whether its a curvy or a pointy, but he only wanted £200 for its and it had only done 4500 miles (according to him).
Let me know if you want his details. Cheers, C |

|
|
12-11-11, 08:05 PM
|
#192 |
|
Guest
Posts: n/a
|
Interesting read. Hopefully I'm never forced into rebuilding an engine but I'd love the opportunity to. Subscribed!
|
|
|
|
03-03-16, 06:47 PM
|
#193 |
|
Member
Join Date: Aug 2008
Location: Stocksfield, Northumberland
Posts: 35
|
I know I'm a little late to this discussion, but here's a dyno run of my 04 SV650 with Hayabusa pistons, increased compression and cleaned up cylinder head ports.
Max power 71.46 hp @ 9400 rpm Max torque 43.94 ft/lbs @ 7500 rpm 
__________________
Custom Upper Triple Clamps: https://www.facebook.com/Sv650-Tripl...?ref=bookmarks My SV projects: https://sites.google.com/site/s1sv65...xr-conversions |

|
|
|
03-06-16, 09:29 PM
|
#194 |
|
Member
Mega Poster

Join Date: Apr 2005
Location: Sunny Swindon
Posts: 3,570
|
Part 19; It's been a while:
About 5 years have passed since the last update. No excuses. Apart from... Well... Stuff. But anyway. Shortly after completing the 2MA I decided that SH2 should have its engine back. So I dug it out. However before that and even before I started on the TZR I bought a replacement crank and took that and the cases down to Piston Broke in Bristol. The brief was to tidy up the cases change the mains for the new crank and fit a thrust washer appropriate for the crank. It took a while to complete, but I wasn't to bothered at the time, I was messing around on a ER6 and SH2 had a replacement engine in it. For reference the ER6 is a capable bike but the SV is better. It must have been a year or so before I got round to it again. First job was to check everything was clean and ready to go back together. It wasn't. The gearbox bearings felt notchy. I expect they had dried out waiting. So the cases were taken to South Cerney Engineering and a few weeks later I picked them up with a complete set of replacement bearings fitted. Another year must have passed before I got round to it again. In my defence I was working on the 250 in that time. But I decided that it was time. The cases were cleaned again, the crank slid in, but the gear box did not. It was a bit tight, I wasn't over happy once I had percussively fitted it to the left hand side. The selectors went in and then the right hand case was placed over it. But it was requiring more effort to fit then I encountered before. Out it all came. Back in it all went. Then I decided to check the gearbox would rotate, it didn't. I was getting frustrated and walked away. It could have been another year before I went back to it, time seams to blur these days. I finally had some spare time and the engine was calling me but the gearbox was still locked. I took everything down to Carter Bikes in Bristol, and Dave set about it. He agreed it was tight, but a little fine sandpaper and some confident knocks had the gearbox in, seated, and rotating. Engine half's together I took it back to Swindon with me to finish off. 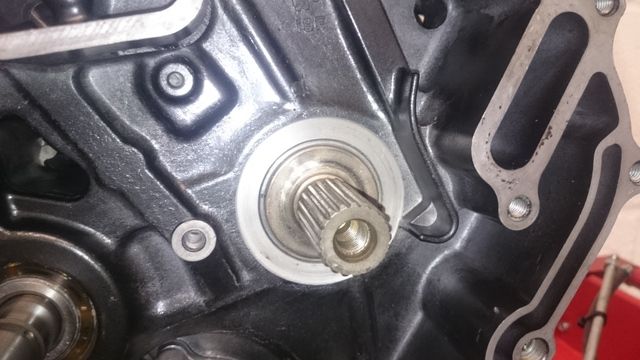 The first job was to put the primary drive on. This is where Piston Broke's repairs came in. As the crank had split and moved about it had done a little damage to the cases. The solution was to machine the right hand case outer side for a new thrust washer. So the crank has both an internal and external thrust washer ensuring it is correctly installed in the cases. 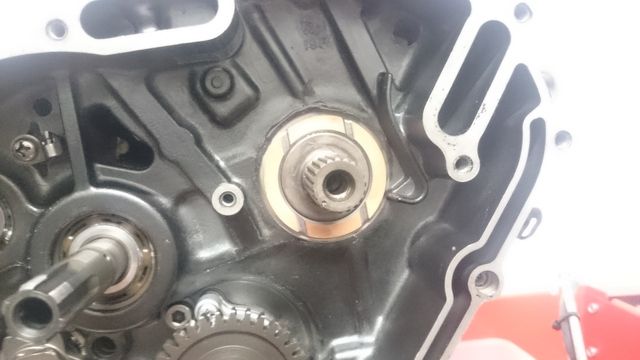 I tightened up the primary drive nut using a different technique then the last time. Previously I had used a bar through the small end of one of the rods against the case to prevent the crank from rotating. But having seen an official Suzuki tool that locked the gear against the case (it was sort of like a 1/4 gear with the teeth engaging and flat sides working against the cases) and with what I used on the TZR I temporary installed the clutch basket and used a 2p piece between that and the teeth of the primary drive to prevent rotation. 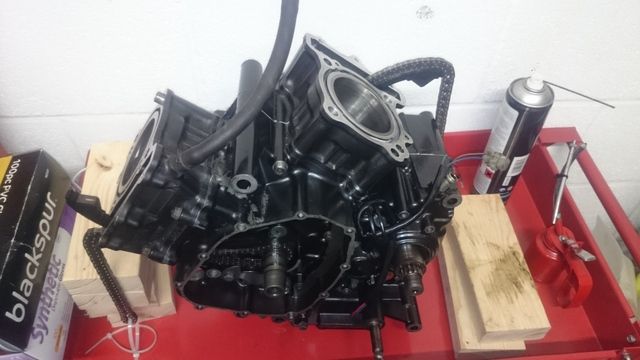 The rest of the build was almost straight forward and most has been covered previously. The oil pump (replacement) went in, followed by the clutch and gear change mechanism. Then it was onto the pistons. This engine is using Hayabusa pistons but unfortunately one of the piston pins had a bit of rust on it from storage. Basically it was for some reason resting on some tissue and while it cleaned up I wasn't happy so a replacement was ordered. The only trouble it I couldn't get it fitted. The first one was a pain, but the second was positively painful. I had to heat both pistons to get the pin in. But when I did the second it still wouldn't go in. Eventually it did, however I was holding the piston off the engine to get the pin in the first side and as it finally slipped in I discovered my middle finger was strategically positioned to prevent the pin from going all the way to the other side. I did think that I had broken the tip of my finger it hurt so much, but no only a little swelling. 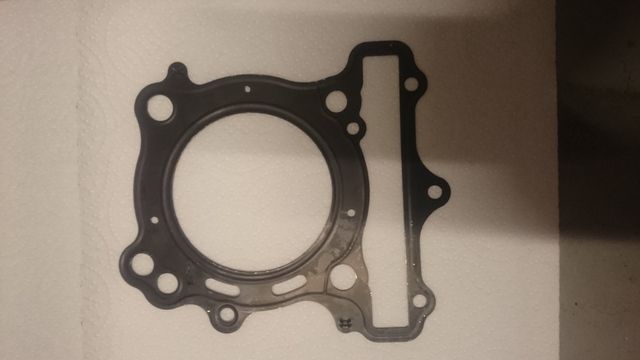 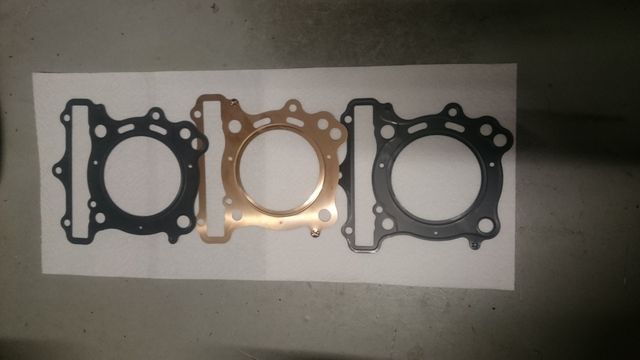 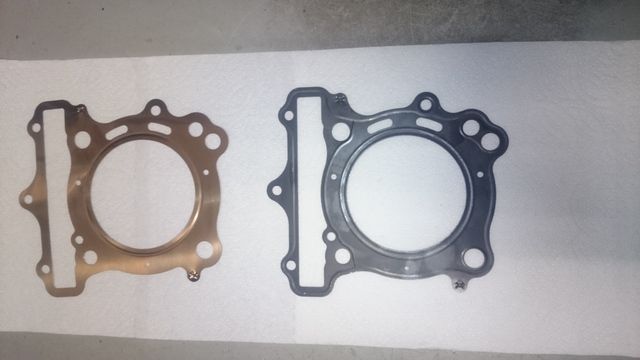 Both pistons on I fitted the barrels, then the heads. But I remembered Barwell asking about the mods the first time round. So a little extra research and I find myself dissecting a pair of perfectly good new head gaskets. The head gasket is made up of 3 layers, 2 outer black layers and in middle shiny layer (this actually validated my Junior sticker trading of two for a shiny, but anyway). The idea is remove the middle layer and the compression is increased. The layers are just pressed together and easy to separate. So they were and a head gasket of 2 black layers were fitted. 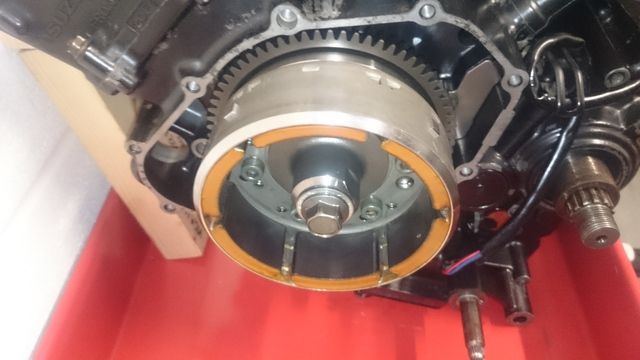 Next the alternator went on. A standard replacement for the one that go chewed up the last time. I couldn't tightened the bolt enough on my own and required Stretchie's ample downforce to assist. But that allowed me to then fit the cams as per the cam swap method. 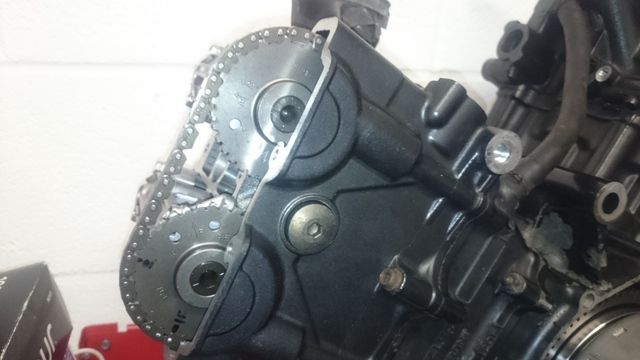 The cam chain tensioners or the rear one at least gave me a problem. The cap bolt took some of the thread out when I loosened it, but I thought there was enough to tighten until I installed it in the engine. I did consider tapping a new thread into it but didn't want to risk swarf floating around the engine and as there was no real instructions on dismantling a tensioner I simply swapped it for a spare that I happened to have laying around. 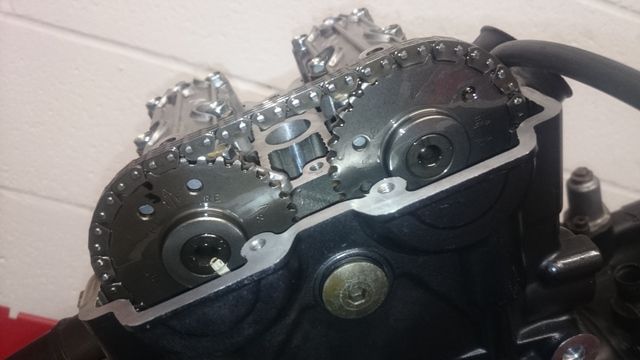 Valve clearances were checked and with cam covers on it was just a task of the clutch cover (that a bolt had vanished from) and the alternator cover. The alternator cover from the original engine was full of magnet fragments so that was binned along with the starter motor transfer gear. Secondhand replacements were used, a combination of spares that I had laying around and parts sourced from members of this wonderful site were installed. |
|
|
|
|
03-06-16, 11:12 PM
|
#195 |
|
Member
Mega Poster
Join Date: Apr 2005
Location: Sunny Swindon
Posts: 3,570
|
Part 20; Take the rest of the bike apart:
So with the engine rebuilt and ready to go in I thought the best thing to do was to dismantle the rear end. There was some madness behind my reason, for the past couple of years there has been an advisory on the rear suspension, nothing major but some play in the bearings. I first decided to take the subframe off for access. 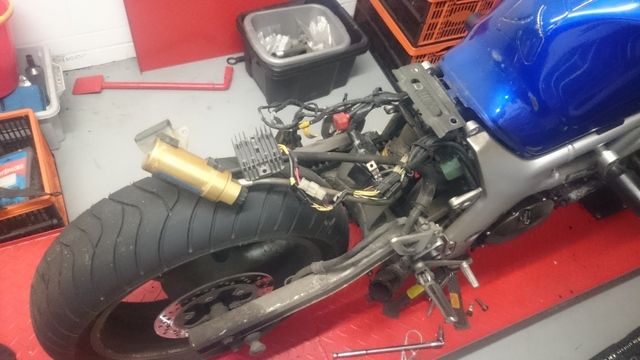 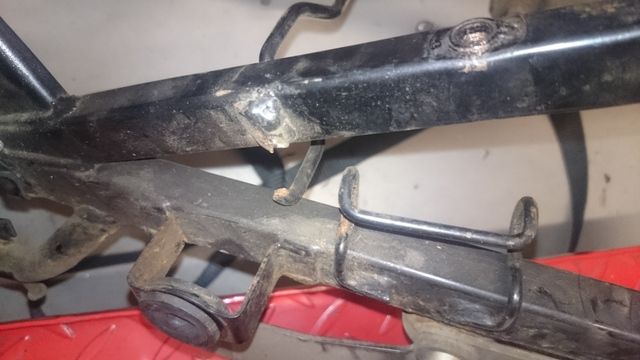 And in doing so remembered about the seat mounting tag having failed at the weld. This isn't the first bike I'd seen it on but fancied doing something about it this time. So I took it into Rolling Art Motorcycles to get them to blob a little weld on it for me. 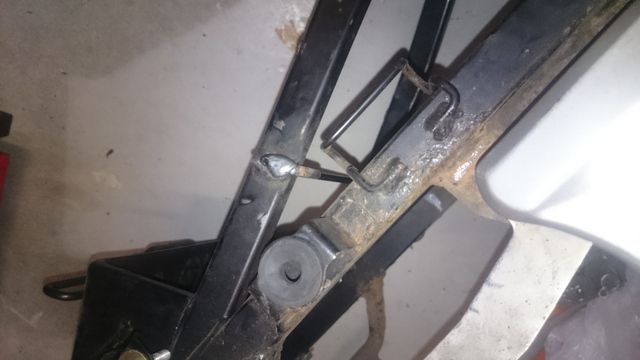 The rewelded subframe was treated to a dab of Hammerite on the weld to protect it and it was ready to go back on. Then to replace the bearings and to do that I needed to remove the suspension and swing arm. Which raises an interesting question of support. Not for me but for the bike, an Abba stand mounts through the swing arm pivot and a paddock stand needs the arm also. I've heard stories of lashups with ladders and ropes but decided to see if some axle stands under the frame would work, and sure enough with one on the left and one on the right the bike was securely supported. 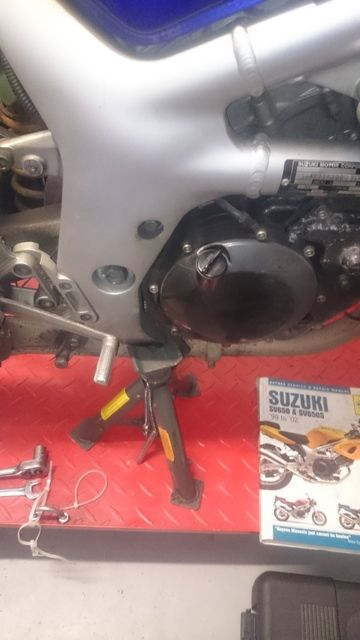 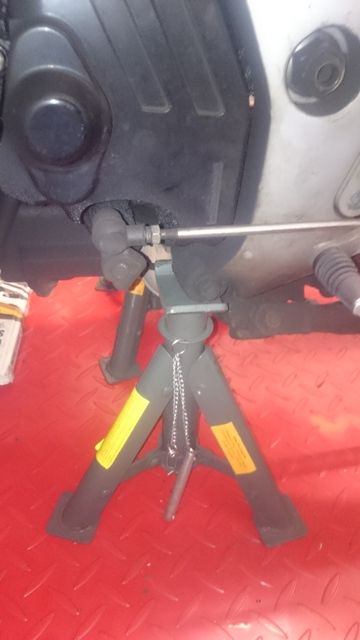 Now I have been using a method of maintenance on this bike that being not washing it to protect the finish. However that gave me a little dirt and grime problem to get through. 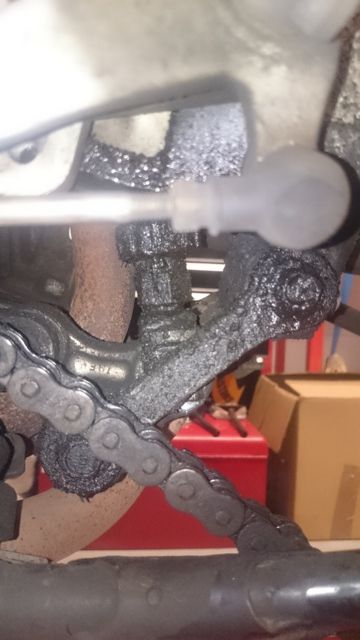 But eventually the shock and the swing arm were removed. I took the shock to MH Racing to be serviced and rebuilt while I set about the bearings. 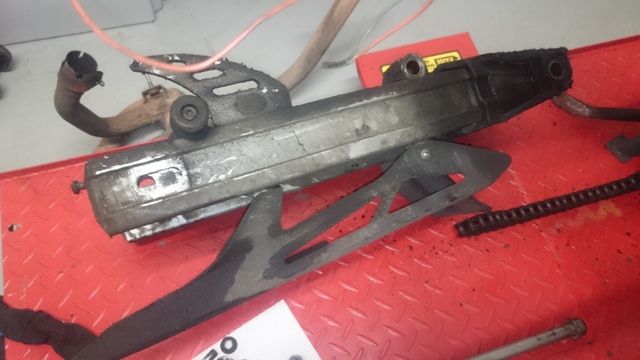 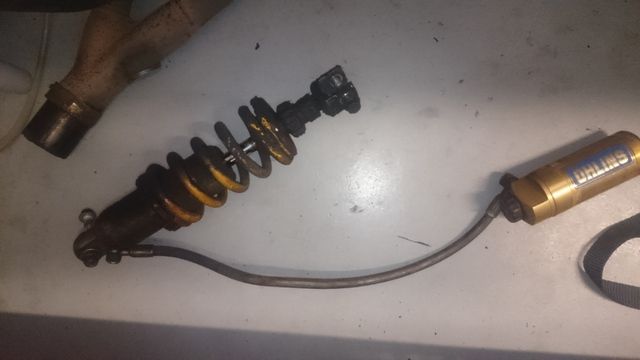 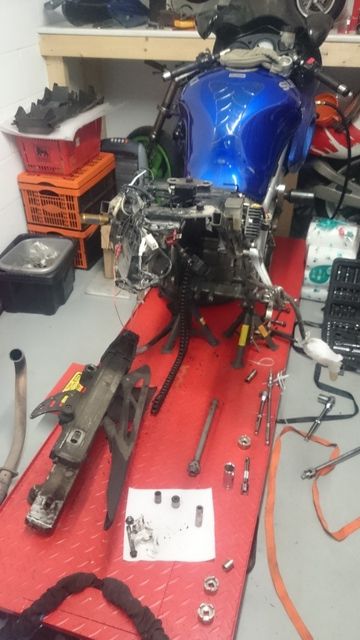 The knuckle was first to be attacked. Now I've changed bearings before, basically smash the old ones out, but this time I wanted to try something a little different. So I bought a 10 tonne press. 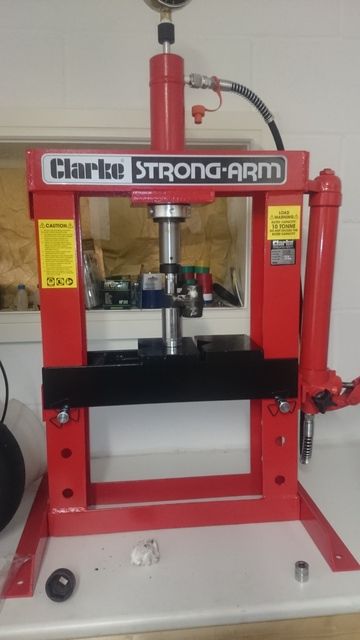 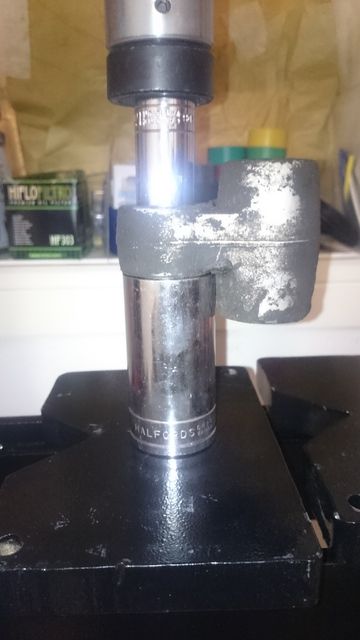 That made getting the old bearing out and the new ones in so much easier. The new bearings and sleeves were a fixed with copious amounts of grease before reassembly was completed. 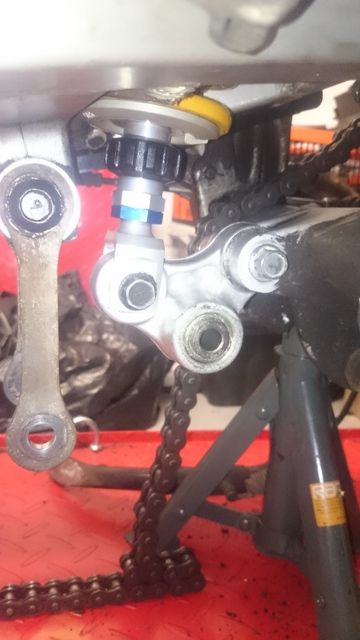 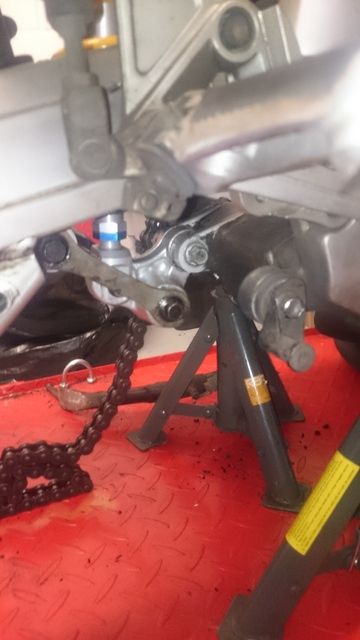 I also put the original rear wheel back in with a fresh tyre as I swapped the wheel with SH1 as that had a good tyre on it the last time I needed to replace one. And so with that I could go back to the engine. (Not sure why the photos are not orientated correctly any more, a quirk of Photobucket it would seem) |
|
|
|
|
03-06-16, 11:32 PM
|
#196 |
|
Member
Mega Poster
Join Date: Apr 2005
Location: Sunny Swindon
Posts: 3,570
|
Part 21; Out with the old (new) and in with the new (old):
This is now the part where I take a perfectly good engine out of a bike and replace it with one I've built. But having taken more than one engine out of a SV I wanted to see if I could make my life easier. 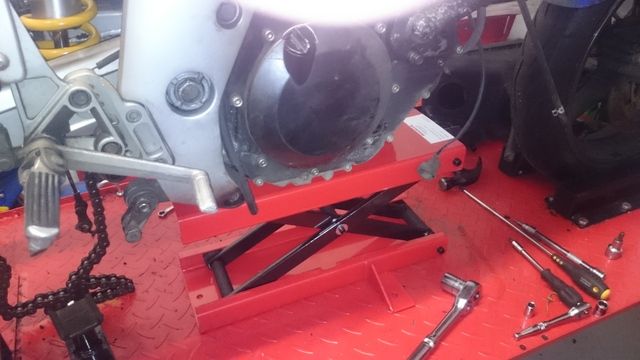 Swapping engines usually consist of a fine balancing act on a car jack along with a lot of sweating. This time I invested in a scissor lift. I placed this under the engine and removed the mounting bolts pivoting it onto its bed. With all mounting bolts removed it was just a simple case of lowering the scissor jack down and sliding it out from under the frame. 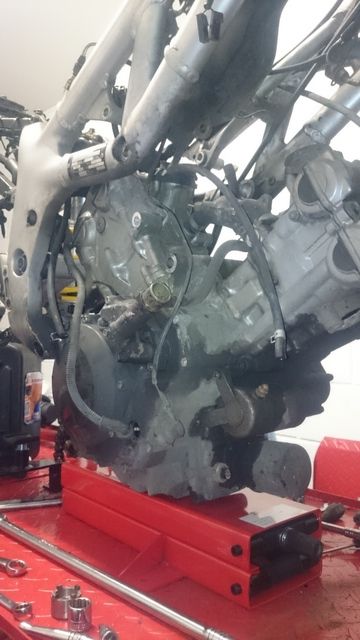 The rebuilt engine was then moved from the build bench onto the scissor lift and this was raised into the frame. 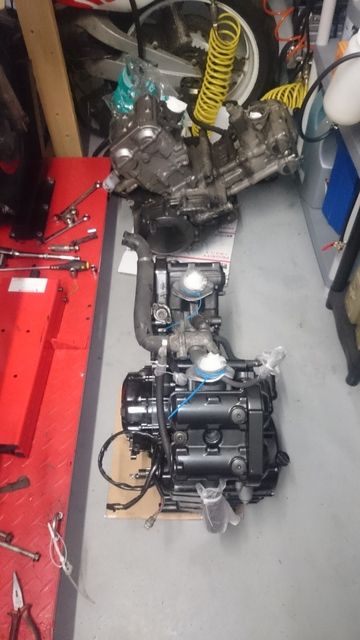 Then it was the simple task of plumping it back in. I say simple, but I did hit a snag with the output shaft thread that had some damage. 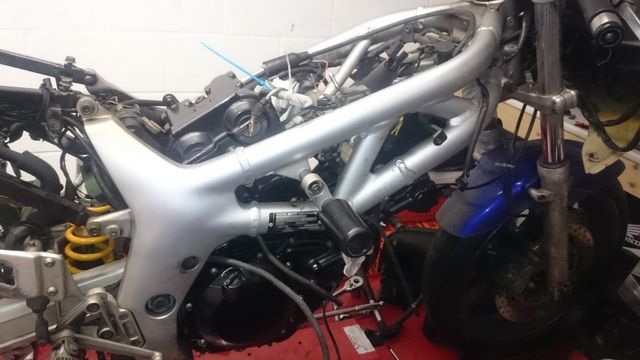 This was tidied up and the sprocket bolt was tightened. More details on the problem and solution can be found in this thread. The only thing remaining was to start it up. A few chugs to get everything circulated was followed by a little throttle and the choke on the next try before the engine roared into life. 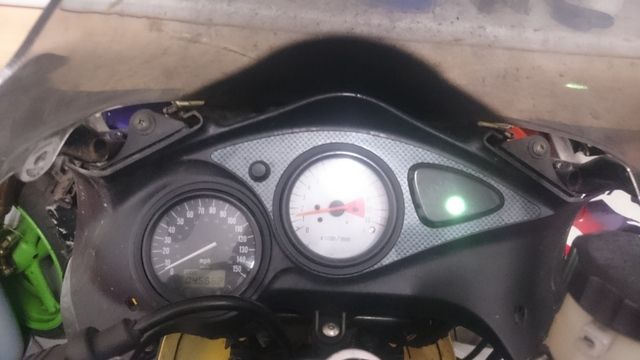 The bike sailed through its MOT today. Arriving home from the test there was a spot of oil under the side stand and some fluid on the clutch cover. I feared the output shaft oil seal was leaking as I cleaned some fresh engine oil from around that area, but I think it was just some left over build residue as a longer ride in the evening has so far failed to recreate it. I'll keep an eye on it though. However there is a slight oil and coolant leak on the clutch side. I suspect the water pump seals and possibly the inner clutch cover. So I'll stick a few more miles on to drop the oil and coolant at 100 miles and replace the seals from there. So how long will this one last? |
|
|
|
|
04-06-16, 06:58 AM
|
#197 |
|
Member
Mega Poster

Join Date: Jun 2009
Location: Durham
Posts: 2,669
|
Thanks for the update SH, a fantastic bit of reference for us all on the org
Ps Hi to GG and the Stretchy one too and im sure i speak for the org majority when i say we miss them on here. 
__________________
Black naked 1999 sv650 which im trying to keep happy Custom paintwork Saragon Customs Spray painting Electrical fault finding guide and Regulator rectifier test Only a biker knows why a dog sticks his head out of a car window. |
|
|
|
|
|
|
 Similar Threads
|
||||
| Thread | Thread Starter | Forum | Replies | Last Post |
| Oban and beyond (Image heavy) | DarrenSV650S | Photos | 3 | 12-06-09 08:53 PM |
| my new baby *image heavy* | Amplimator | Photos | 17 | 11-05-09 10:19 PM |
| Been out for my best ride yet (image heavy) | Magnum | Photos | 26 | 11-04-09 12:08 PM |
| Colchester Zoo. Very image heavy! | Jester666 | Photos | 5 | 11-08-08 07:48 AM |
| 70s bike day at the Ace (Image heavy) | empty | Photos | 6 | 23-07-07 03:33 PM |
