 |
 |
|
|
#111 |
|
Member
Mega Poster
Join Date: Apr 2010
Location: Newcastle upon Tyne, Just south of salad dodging country
Posts: 7,750
|
Speak to the custom lads you found in Bristol
__________________
RIP Reeder 20/07/1988 - 21/03/2012. Always missed squire!!! Every year we meet old friends, gain some new ones, lose old ones and you always remember them all. “Live as if you were to die tomorrow. Learn as if you were to live forever.” Mahatma Gandhi |
|
|

|
|
|
#112 |
|
Member
Mega Poster
Join Date: Jan 2007
Location: Plymouth, England
Posts: 3,787
|
Fair enough!
__________________
Phil I'm not here for a long time, I'm here for a good time! Blue SV650 K3, GSX-R K5 front end, TL1000S clip-ons, lower fairings, seat cowl, gel seat, Pyramid undertray, R&G crash bungs, stainless steel bar ends, full titanium Akrapovic exhaust, Power Commander, clear rear light, flush mount front indys, mini rear indys, Autocom 300 duo intercom, Acumen cat 1 alarm and Micheline Pilot Power 2ct's. |
|
|

|
|
|
#113 |
|
Member
Mega Poster
Join Date: Apr 2005
Location: Sunny Swindon
Posts: 3,575
|
It looks like I haven't done anything with this for about a month, but I assure you all I have, just been a little late with the updates as it didn't really look like much has happened but a fair bit has been going on.
So todays update, the steering bearings. Got my local bike shop, Artdeans to press the lower yoke bearing on for me first using a Yambits tapered head bearing kit. I got the oil seal, followed by the bearings dust seal, followed by the bearing pressed on. Decided to get them to do it for me as its a couple of minutes if you have the right equipment as opposed to risk damaging the yoke or bearing if you don't. 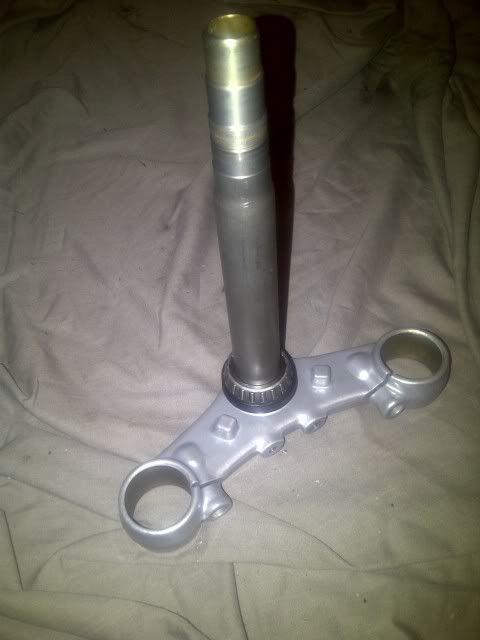 I then installed the lower yoke race into the frame by placing the frame at the top of my stairs to flatten the stem to work on as the shape of the frame fitted nicely. I had the yoke on the top step and the tail of the frame on the 3rd step down, plus with it being carpeted the risk of damaging the powder coat was reduced. To install the race I used one of the original races to spread the load of the impending hammer as with the new race in the yoke the old one would not meet the outer sides of the yoke and would not get stuck. On top of the race I placed a 32mm impact socket to hit. And with a couple of taps in it went. 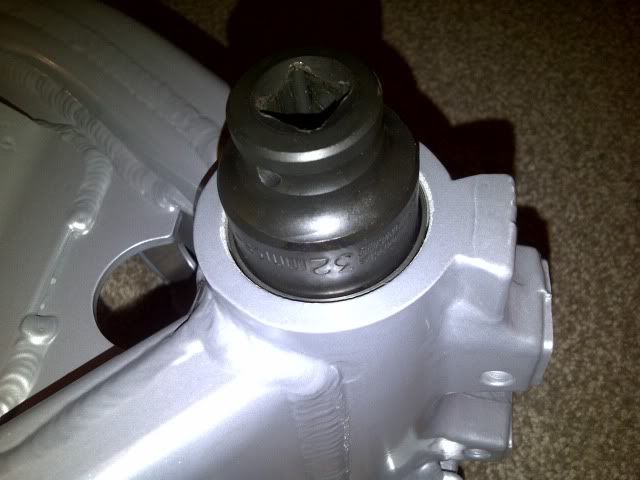 I'm sure I have the right kit, but I don't fancy having to change these again as the lip of the frame is larger than the bearing race, so there's not really anything to hit. Thoughts welcomed here? 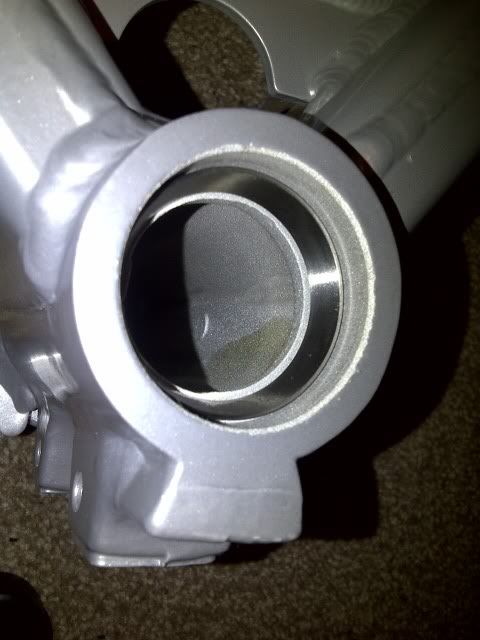 Then it was on to the top race. Same method of insertion was used. Here the race is proud of the frame, but I've had this before on my SV when changing head bearing and have been assured this is fine. 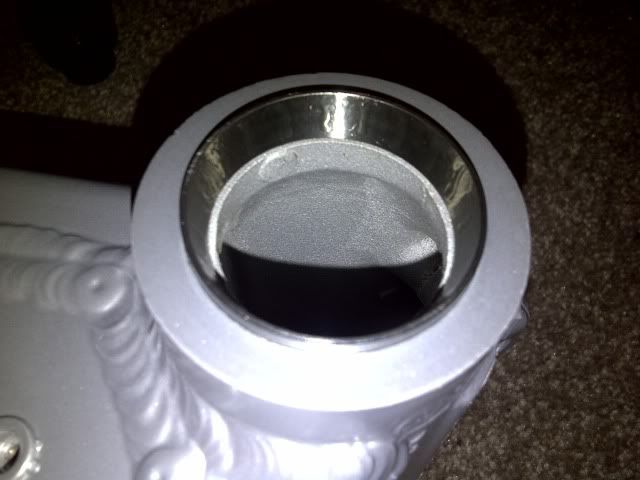 Then I installed the lower yoke and the upper bearing and dust seal followed by the cover and then the nut just to have a look at it. I need to grease the bearing before tightening it up properly, but with it finger tight the yoke didn't move as smoothly as I expected. 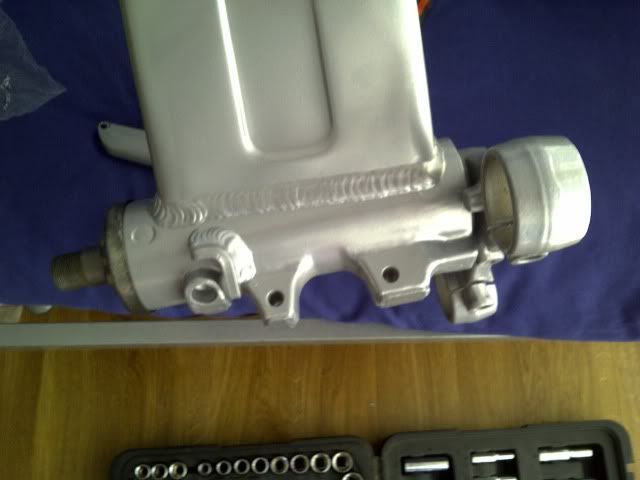 There is no notchiness but it feels stiff. It all looks correct when assembled but just doesn't feel quite right. So I took the yoke out again and think I have located the issue. When I press down on the lower bearing as if it were under load I think the dust seal is catching on it and tightening its movement. 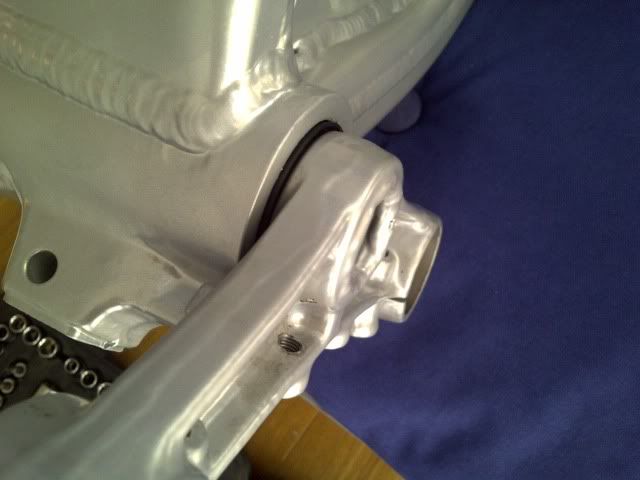 So looking for some advice on this one now. Will this improve with grease and proper installation in the frame or has something gone wrong and what's the best way to resolve it? |
|
|

|
|
|
#114 |
|
Member
Mega Poster
Join Date: Apr 2005
Location: Sunny Swindon
Posts: 3,575
|
So the head bearing problem...
Further investigation showed that it wasn't just the dust seal that was catching. The top of the lower bearing was rubbing on the frame. The more I tried it the more obvious it was showing up as I was finding some fine powder that looked like what you get when sanding metal down on the bearing. And finally I could see where it was rubbing on the frame. 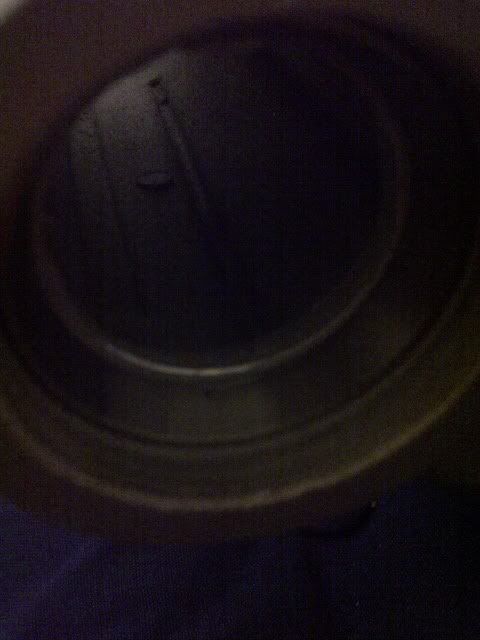 Basically the lip that the bearing sits on is much bigger than expected which is interfacing with the bearing top. I spoke to Yambits and sent them the photos. They reviewed them and agreed that there was something not quite right with my frame, or at least its different than they had previously seen. They told me that they had sold many of these kits before and I'm the first with this problem. But that didn't help me, so they gave me a refund for the kit. I'm happy with this and cannot fault their service and will continue to use them. So I decided to revert to OEM bearings, cost is a little more but should fit my frame without issue. Or that's the hope. First thing I needed to do was to get these bearing races out as there is no edge for me to hit them out with I took the frame to Rolling Art to partake of their welding skills. 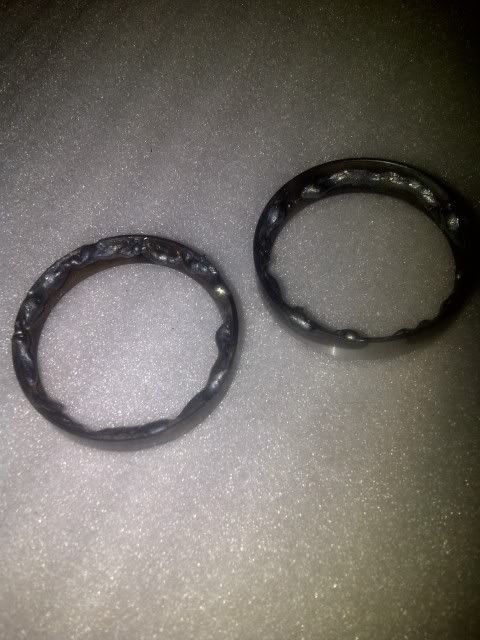 There is a risk in doing this as there is a lot of heat going through the head stock and the powdercoat may react to that. So the headstock was wrapped in a wet rag to try to prevent this. And on the whole it did, but there was a small burn from a bit of splatter on the top. But this is fine as it will be all hidden once the rest of the yoke is on. It was interesting to see how the welding worked. I expected that a tab would be needed to be welded on and then the bearing tapped out, but no. Just a lot of weld spread round the race. So how does it work I wondered? And the answer is though the heat of the process expands the metal when the weld is added the weld once cooled contracts and as the bearing works on being such a tight interference fit this contraction all over the bearing is enough to reduce it in size so it just pops out. The next thing to do is to put the new OEM bearings in.
__________________
"A little enthusiastic?" May I add here, GG is awesome and I think I am in love with Stretchie...he rocks my world! SH2 | 2MA | GROM | YSR Last edited by squirrel_hunter; 24-06-13 at 10:16 PM. |
|
|

|
|
|
#115 |
|
No, I don't lend tools.
Mega Poster
Join Date: Jul 2003
Location: Skunk Works, Nth London
Posts: 8,680
|
A process called shrinking - similar principal - is used in sheet metal fabrication/bodywork repairs.
__________________
If an SV650 has a flat tyre in the forest and no-one is there to blow it up, how long will it be 'til someone posts that the reg/rec is duff and the world will end unless a CBR unit is fitted? A little bit of knowledge = a dangerous thing. "a deathless anthem of nuclear-strength romantic angst" |
|
|

|
|
|
#116 |
|
Member
Mega Poster
Join Date: Apr 2005
Location: Sunny Swindon
Posts: 3,575
|
So OEM bearings were ordered and quickly arrived. And I set about installing them starting with the top lower race.
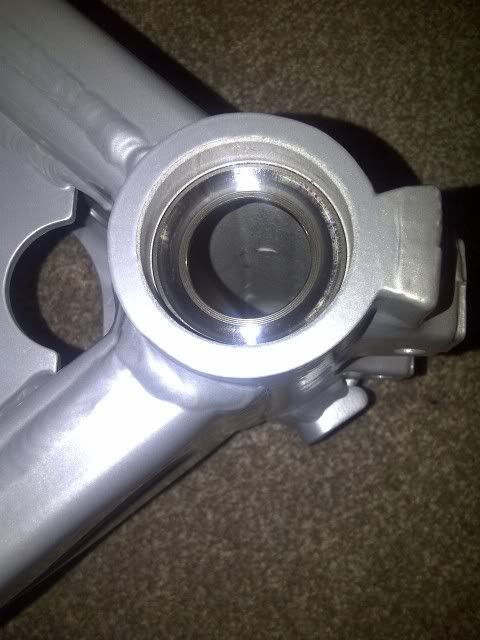 Before doing the top bottom. You can also see where the splatter hit. 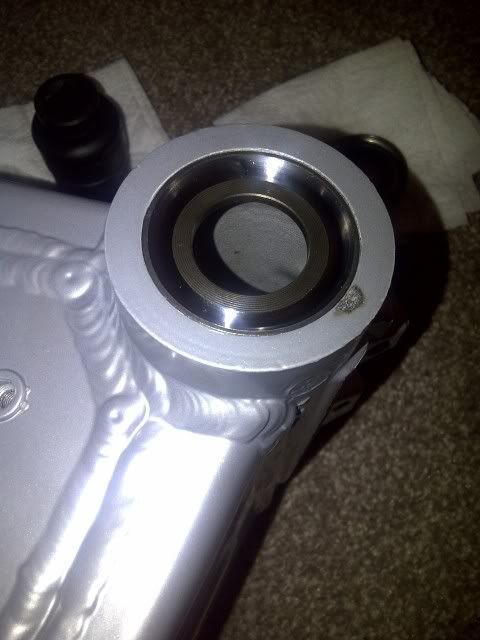 Installation process was the same as the tapered rollers. I used one of the old bearings to spread the load over the outer edges of the race and a 32mm impact socket to hit it home. Now to the lower yoke. Artdeans swapped the lower tapered bearing for my new lower race when I picked up the bearings so didn't need to worry about that. Just needed to add 19 ball bearings into the mix. 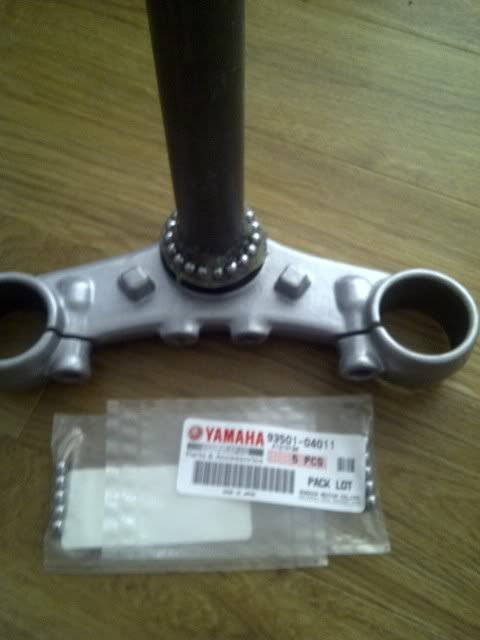 Smeared the race with grease and then popped the bearings in. Then added more grease to the top of the balls, and even smeared some around the bottom top race. I understand this is a novel approach according to some manufacturers. 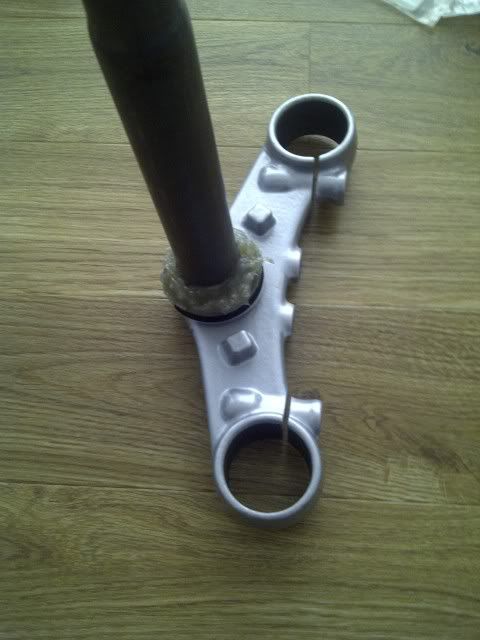 I then dropped the frame over the lower yoke and repeated the process with the bottom top race. Grease, 19 balls and more grease. 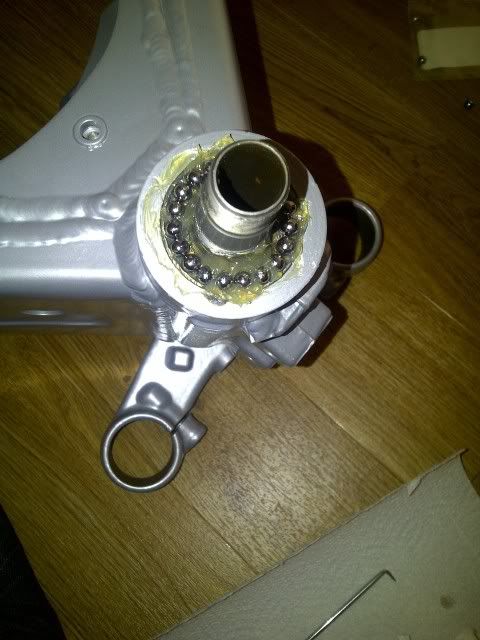 Finally adding the top top race, the cover, and the nut. Tightened the nut down and loosened it off a little and the bearings feel mighty smooth. 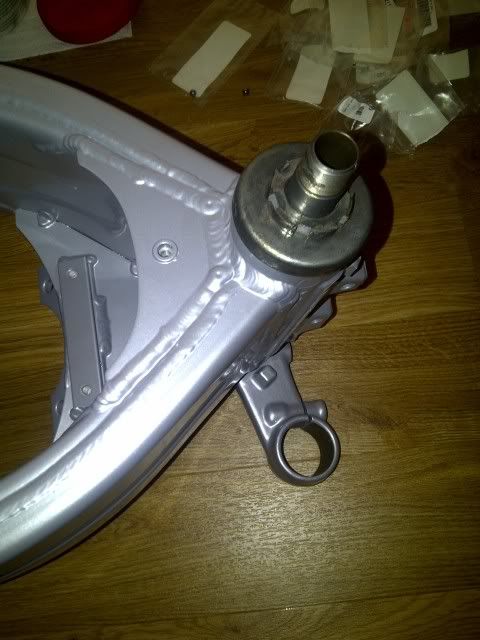 Just need to add the top yoke, oh and the rest of the bike. |
|
|

|
|
|
#117 |
|
Member
Mega Poster
Join Date: Mar 2007
Posts: 9,097
|
Cool that's that problem solved
__________________
We're riding out tonight to case the promised land Make everyday count RIP Reeder - Jolly Green Giant and comedy genius |
|
|

|
|
|
#118 |
|
Member
Mega Poster
Join Date: Apr 2005
Location: Sunny Swindon
Posts: 3,575
|
And now for the wheels.
Put the bearings and spacers and seals into both the front and rear wheels. Used new bearings and seals from Yambits. First time I'd done it and it went well. The only thing I would say is the spacer between bearings can move so once the bearing is in the grove every other hit check that it is still straight as it goes down and finally seats. And hitting things means you need to be careful. One slip and the hammer can hit the wheel rim and chip the fresh powdercoat. 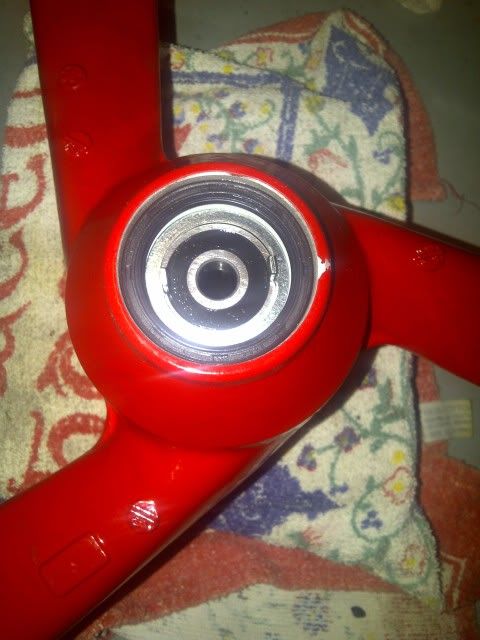 Not to bad, just very annoying. Touched it up with some red Hammerite so doubt you will be able to see it once on the bike. I used sockets on the outer races of the bearings to tap them home. And another recommendation would be to check that you have the correct sized sockets before you start otherwise you might find yourself running round trying to find a 25mm or 26mm socket to use just as the shops are shutting. Before I put the bearings in I checked that the sprocket carrier could fit still. And its lucky I did check because it didn't. This was due to the thickness of the powdercoat on the hub, a bit we didn't think needed masking. So out with the sand paper it was and eventually I took enough of it off to get it to fit, not pretty but it will be hidden anyway. 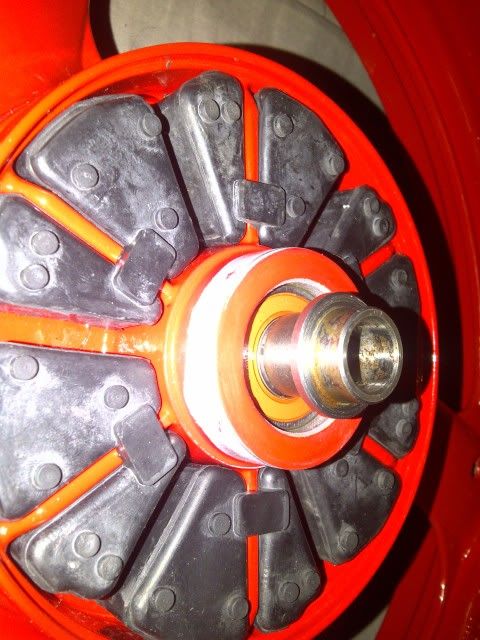 Then it was tyres. Was going to go for the BT45's but a chat with my local tyre shop Bike Treads and I came away with a set of Continental ContiTwist Sport SM fitted. Decided to go for them over the BT45's as the ContiTwists were listed as a Super Sport tyre, they even do a track version. The tread pattern also looks like Road Attacks and I've had them on my SV for years. So I'm going to give them a try, if it works out then good, of not then I'll get a set of BT45's next. The interesting thing was the pair of the ContiTwists were very noticeably cheaper than anything else I could get... 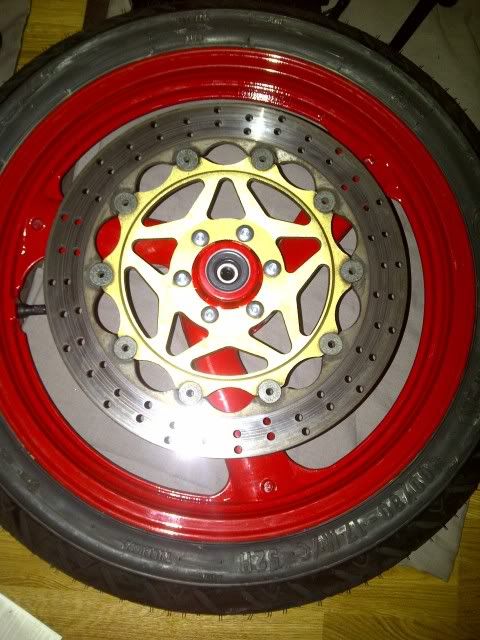 Anyway with the tyres fitted I put the brake discs back on with new bolt from Yambits, then put them to the side while I got on with the forks. |
|
|

|
|
|
#119 |
|
No, I don't lend tools.
Mega Poster
Join Date: Jul 2003
Location: Skunk Works, Nth London
Posts: 8,680
|
Looking good!
__________________
If an SV650 has a flat tyre in the forest and no-one is there to blow it up, how long will it be 'til someone posts that the reg/rec is duff and the world will end unless a CBR unit is fitted? A little bit of knowledge = a dangerous thing. "a deathless anthem of nuclear-strength romantic angst" |
|
|

|
|
|
#120 |
|
Member
Mega Poster
Join Date: Apr 2005
Location: Sunny Swindon
Posts: 3,575
|
I've also rebuilt the swingarm. That sounds a little more extreme then it actually was. Basically stuck a swing arm repair kit from Yambits in which is the two swingarm bearings and the internal spacer. Added to that new thrust washers again from Yambits and it was good to go. Until I noticed I'd forgotten the two washers that sit outside the swing arm and under the thrust washers. Not an issue as it was just a case of pulling the thrust washers off and putting them back on with the washers between them. But it was close as I am keeping everything until it is finished and I only discovered the washers at this late stage as they were attached by grease to the inside of the old thrust washers and not easy to spot.
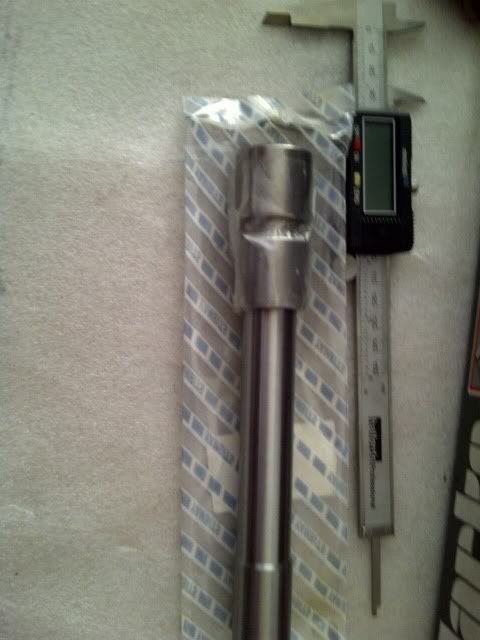 The bearings were installed in the same way as the other bearings but the Yamaha manual is a little unclear as to how far down it should sit. According to the works manual the bearings should be 0.5 - 1.0mm within the pivot, but there is a little lip down the pivot so not sure if it should be measured from there or not. But I have the bearings in the pivot in a position I am happy with. 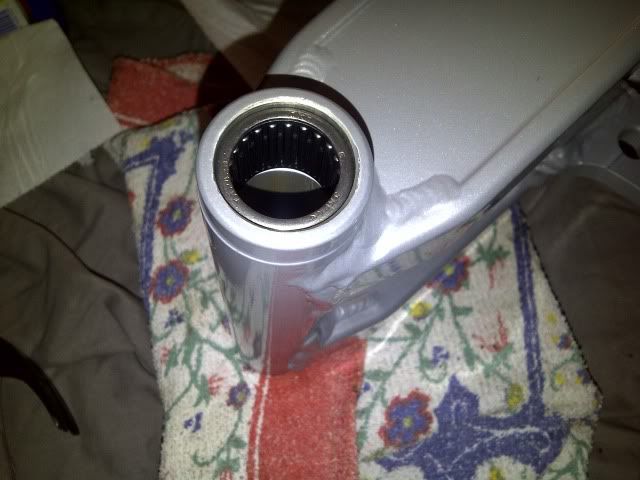 Also built the sprocket hub with new studs from Yamaha, and new bearings, seals, lockwashers, and sprocket from Yambits. I reused the nuts as they were undamaged and though a bit dirty looking now they wont stay visible for long once the chain lube gets to them. If I were to rebuild the hub again I'd stick the spacer into the bearing before installing the bearing in the sprocket. Not a big problem, but would have made it easier. 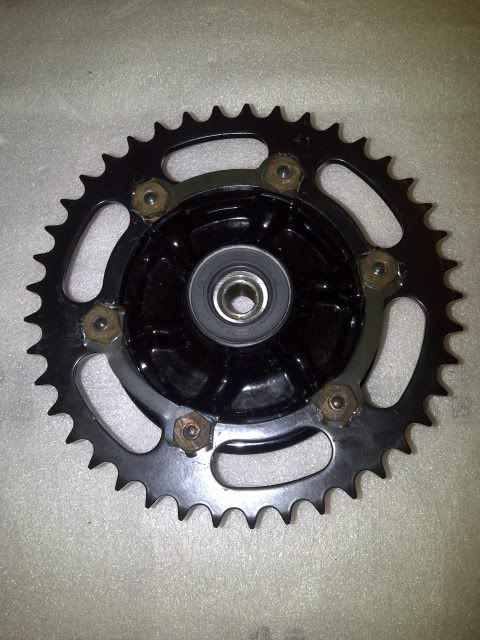 And I almost forgot an new chain guide was added to the swingarm. 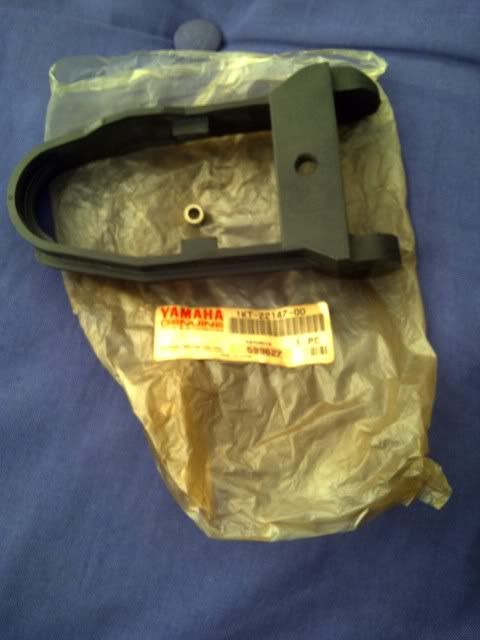 The original was well used. I don't think the previous owners kept on top of chain maintenance as there were marks on the swing arm and the frame from the chain hitting. I did need to reuse the collar from the original, but cant really understand why this is a separate part. |
|
|

|
 |
|
|
 Similar Threads
|
||||
| Thread | Thread Starter | Forum | Replies | Last Post |
| Garage can't find paint colour for the SV | Fifteen15 | SV Talk, Tuning & Tweaking | 21 | 09-09-11 11:04 PM |
| It's amazing what you find in your garage | dirtydog | Photos | 20 | 07-05-10 08:52 AM |
| Classic Bike find in garage | kwak zzr | Bikes - Talk & Issues | 13 | 13-03-09 06:42 PM |
| Where can I find clutch housing bolts? - Cant find any | mikeSV | SV Talk, Tuning & Tweaking | 2 | 24-03-08 12:30 PM |
| Where can I find a good garage in London | fred | SV Talk, Tuning & Tweaking | 4 | 20-01-06 03:34 PM |