 |
 |
 16-03-14, 08:43 AM
|
#321 |
|
Member

Join Date: May 2012
Location: Wickford, Essex
Posts: 259
|
NIIIIICE! Getting there, SH, getting there!
__________________
"If more of us valued food and cheer and song above hoarded gold, it would be a merrier world." -Thorin Oakenshield, The Hobbit |

|

|
|
16-03-14, 09:02 AM
|
#322 |
|
Member
Mega Poster

Join Date: Mar 2007
Posts: 9,096
|
Sounds pretty spot on in the vid, glad you've got over that problem
__________________
We're riding out tonight to case the promised land Make everyday count RIP Reeder - Jolly Green Giant and comedy genius |
|
|
|
|
17-03-14, 01:24 PM
|
#323 |
|
Guest
Posts: n/a
|
Glad you got it sorted. You're going to be grinning riding that, i can tell you.
|
|
|
|
19-03-14, 11:35 PM
|
#324 | |
|
Member
Mega Poster

Join Date: Apr 2005
Location: Sunny Swindon
Posts: 3,572
|
Quote:
|
|
|
|
|
|
19-03-14, 11:55 PM
|
#325 |
|
Member
Mega Poster
Join Date: Apr 2005
Location: Sunny Swindon
Posts: 3,572
|
So problem solving has been in order. Changed the water pump gasket. I drained the system, disconnected the hose, and then removed the cover. New gasket, reattach everything and fill the system. The following day I find the pump cover leaking worse then before.
Stage 2 of the fix was to drain the coolant and remove the clutch cover. Well I think that the cover was leaking so I need to play with that as well. 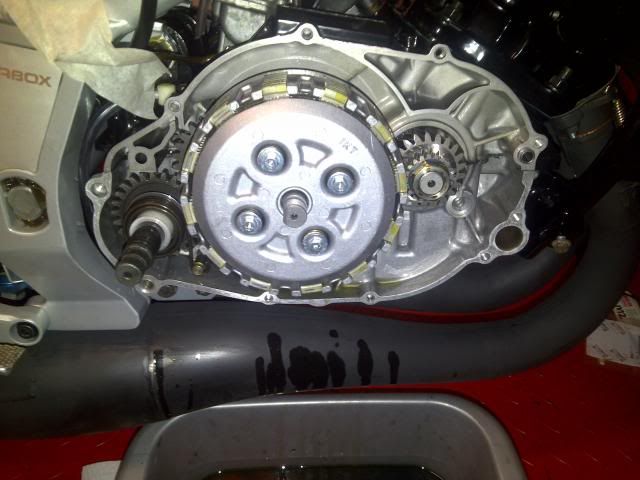 Drained the oil and coolant while the bike was on the paddock stand. Then popped it on the side stand to hopefully stop any extra oil dripping off. Wasn't perfect put it think it helped somewhat. Replaced the clutch cover gasket. Used the same one as before, but noticed that there is something not quite right, and it was the same on the old one. But when I put the original on it appeared to go on fine. This time I thought I'd just trim the bolt holes. And while the gasket drops a little below the cover its not obvious and it seals fine. I wasn't sure that it was leaking it was more of a weep but now I can't find anything to worry about. 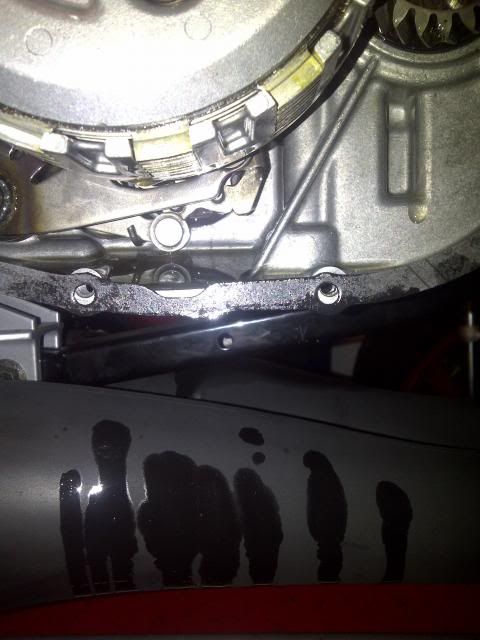 I reused the water pump cover gasket, but this time as with the reed block gaskets I used a little instant gasket. Let it dry overnight and then filled the system. So far I have found no leaks. Also been painting the exhaust again so that is just drying now. I have also ordered some bolts for the fairings and plan to book an MOT next week... |
|
|
|
|
20-03-14, 09:29 PM
|
#326 |
|
Guest
Posts: n/a
|
Sounds just like my mates collection of tzr/tdrs so ytou cant be far off
|
|
|
|
23-03-14, 01:24 AM
|
#327 |
|
Member
Mega Poster
Join Date: Apr 2005
Location: Sunny Swindon
Posts: 3,572
|
Back to the garage and setting the bike up and doing the finishing touches. Checked the stroke of the oil pump which was nicely in tollarance. Also bleed the pump again as I had to disconnect the feed for the clutch cover replacement. So I could now put the pump cover on.
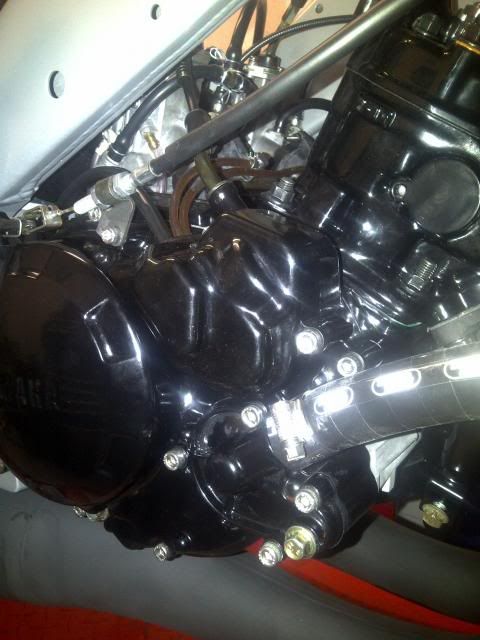 I tidied up the front wiring and stuck the headlight back on. I have a feeling I might need to play with the wiring again when I put the indicators on, but that shouldn't be to bad to do. 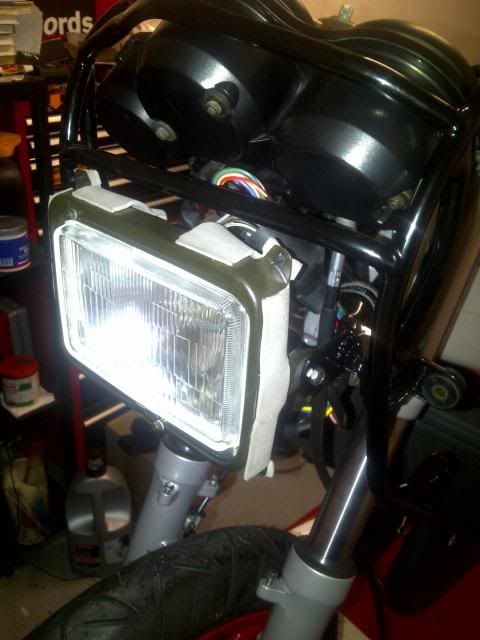 Then I adjusted the chain and sorted out the rear axle nut. Due to the powdercoating the lock nut for the axle nut didn't go all the way over the axle leaving a couple of unused treads on the lock not. This didn't feel me with confidence. So I went down to a large bike dealer with the axle nut and decided to find a self locking nut that would fit. Got a couple of odd looks while doing this but I found a suitable nut. 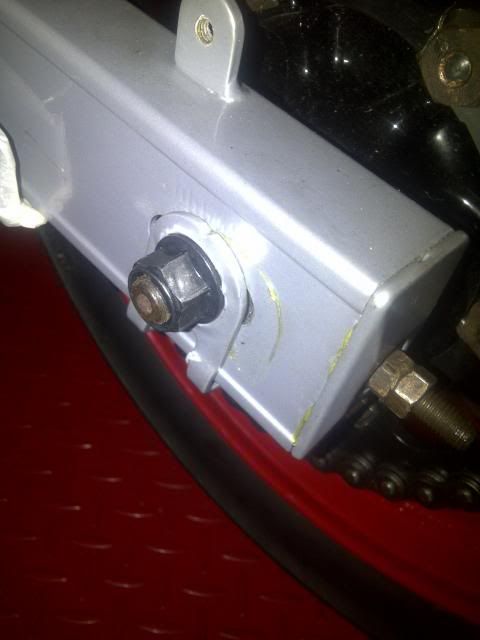 While a KTM Duke 200 has the correct design I kept it in the Yamaha family by using a YZFR125 (or as I call it the new TZR125) axle nut. Part number 95607-14200 I believe is what I was supplied if you want, torqued up to 105nm. The exhaust has also been repainted. The leak doesn't appear to be there any more. Just need to do a few things, the main one being the bodywork. |
|
|
|
|
23-03-14, 01:50 AM
|
#328 |
|
Member
Mega Poster
Join Date: Apr 2005
Location: Sunny Swindon
Posts: 3,572
|
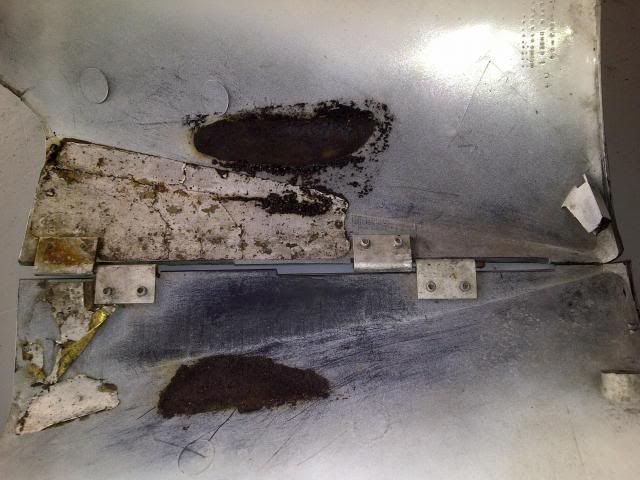
Plastics, bodywork, fairings. My attention was taken by this at the beginning as the bike was missing the front fairings. So I managed to source a set of fairings from a chap on the old TZR forum, forgive me I cant give full credit as it was so long ago, but I was very lucky to get them. They were used and needed some attention the lowers for example had the hinges stuck.
 So I drilled them out. 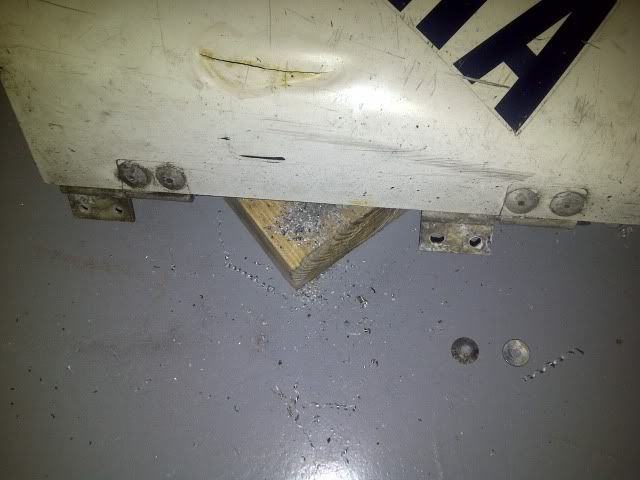 Just need to sort out some form of replacement.  The lowers had a little damage on them. 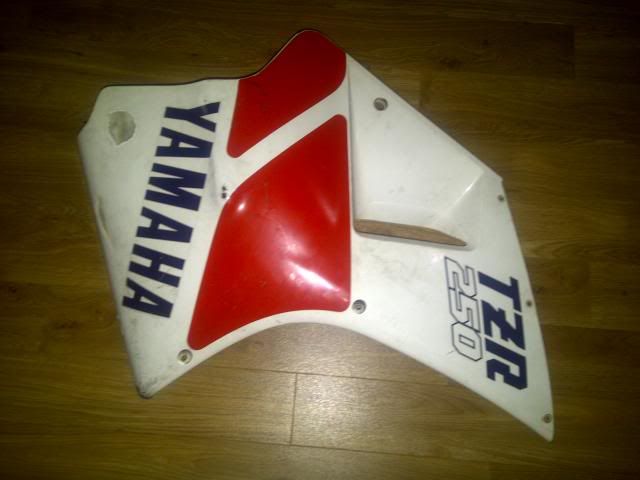 But the upper was good.  But overall they needed a respray. So I had them done at the same time as the tank. But I needed some fairing stickers and no one did the 2MA set that the bike should have. So Corf from the old TZR site made some copies from the fairings that I had, and they are available on eBay. However I ran in to some trouble when putting them on they bubbled, and so did the replacements. Could not explain why, they guys putting them on had done it plenty of times before and the stickers supplied were the same as others had used. Just a strange thing. No criticism of the stickers, but I'm not using them for a little colour issue. If you are doing the full bike they are fine but the red that Yamaha used has a little orange in it and if you have a pair of new rear panels they wont match. So I had to source a set of new Yamaha stickers also, but I think it will be worth it in the end. The new rear panels didn't come with the foam inserts that the 2MA has in place of the indicators. Luckily the original panels still had them in. 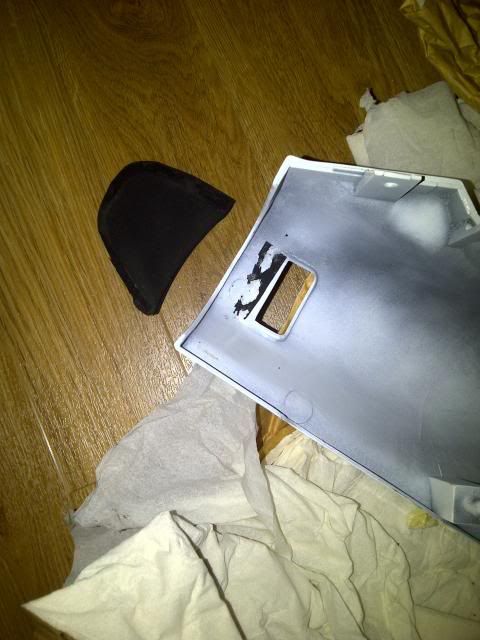 So I swapped them over. They are actually 1KT panels so had some extra foam that I needed to remove to fit the foam I wanted, but with a little hot glue they went in. 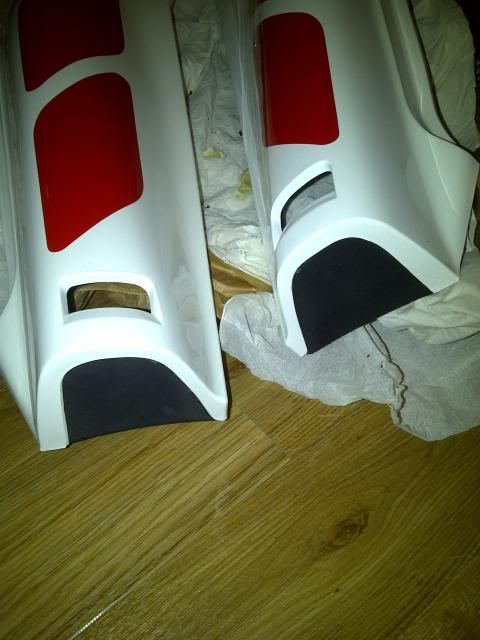 I also put the foam dampers on the inside of the front fairing that the headlight goes against. 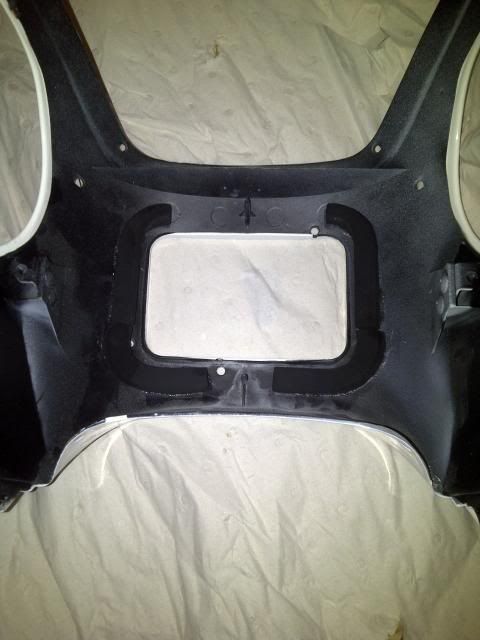 Next is to get the plastic on the bike. Oh and sort the petrol tank out. |
|
|
|
|
23-03-14, 02:09 AM
|
#329 |
|
Member
Mega Poster
Join Date: Apr 2005
Location: Sunny Swindon
Posts: 3,572
|
So the petrol tank, after being acid dipped, brazed, and painted had developed a little surface rust over time from when it was painted until now.
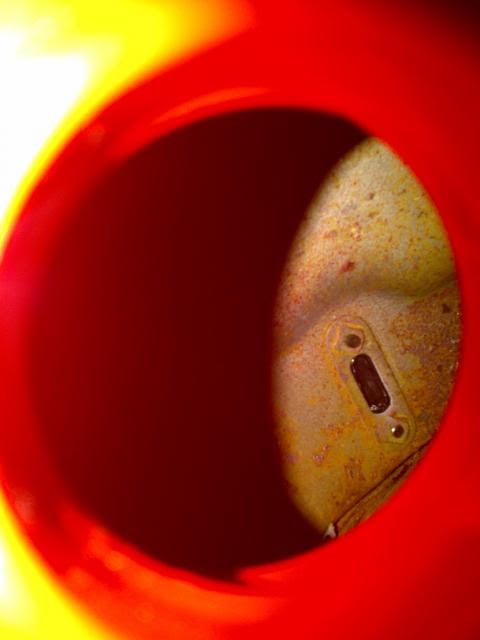 Its not to bad, but it means the tank needs to be lined. I decided to use Kreem that I ordered from Yambits. Its a 3 stage process. The first stage removes the rust, the second removes the removal, the third lines it. But first I need to plug that little hole in the bottom of the tank. For this I am using the original filter. It was already damaged from the stale petrol so I ripped the feeds out and filled it with instant gasket. Then with a little more gasket sealed the filter to the tank. 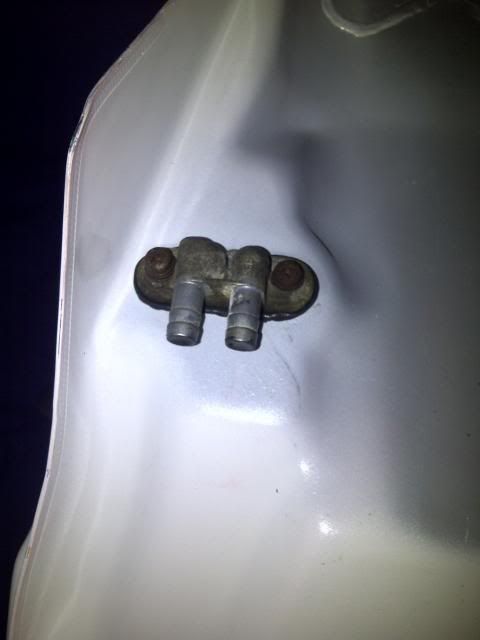 I taped up the filler cap surround and then covered the rest of the tank with plastic in case I spilt any. Hopefully I will not damage any of the paint work or pass out from the fumes while I do this. 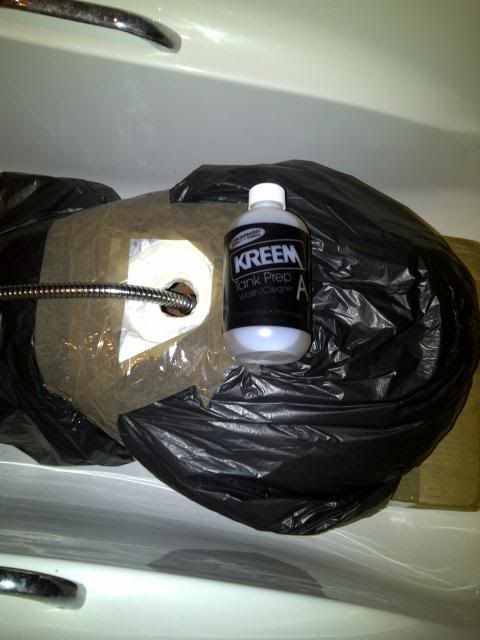 Then off to the bathroom and its extractor fan to begin stage 1. The tank hopefully protected is in the bath and the chemical added with some water. It will stay there overnight before stage 2. But I noticed something odd with the kit. To get it to work all of the surface needs to meet with the chemical. So I brimmed the tank with water. But the instructions say to dilute with 2.5 gallons of water, which is 11 litres of water and the tank holds 16 litres. From experience most tanks (with the exception of a Firestorm) hold roughly the same amount so wouldn't it just be easier to have a more suitable amount of chemical? Anyway I hope it hasn't been diluted to much, only time will tell... |
|
|
|
|
23-03-14, 08:30 AM
|
#330 |
|
Member
Mega Poster

Join Date: Apr 2010
Location: Newcastle upon Tyne, Just south of salad dodging country
Posts: 7,750
|
It looks good
 It is a daft thing with the Kreem kit, the POR15 system is the same (the bottle sizes are too small). I used the stripper in the kit in a stronger mix (ordered a bigger kit as a precaution) as it didn't do anything at the recommended mix. If the stripper doesn't work, go onto Frosts website or order some phosphoric acid written with a brio
__________________
RIP Reeder 20/07/1988 - 21/03/2012. Always missed squire!!! Every year we meet old friends, gain some new ones, lose old ones and you always remember them all. Live as if you were to die tomorrow. Learn as if you were to live forever. Mahatma Gandhi Last edited by andrewsmith; 23-03-14 at 08:32 AM. |
|
|
|
 |
|
|
 Similar Threads
|
||||
| Thread | Thread Starter | Forum | Replies | Last Post |
| Garage can't find paint colour for the SV | Fifteen15 | SV Talk, Tuning & Tweaking | 21 | 09-09-11 11:04 PM |
| It's amazing what you find in your garage | dirtydog | Photos | 20 | 07-05-10 08:52 AM |
| Classic Bike find in garage | kwak zzr | Bikes - Talk & Issues | 13 | 13-03-09 06:42 PM |
| Where can I find clutch housing bolts? - Cant find any | mikeSV | SV Talk, Tuning & Tweaking | 2 | 24-03-08 12:30 PM |
| Where can I find a good garage in London | fred | SV Talk, Tuning & Tweaking | 4 | 20-01-06 03:34 PM |

